Diary of a Clueless Gardener: Planting our first vegetables


Well, well, well, what an exciting update I have in store for you! 

But first, I must apologise. I’m becoming a bit more unreliable with updating this blog… I’m going to aim to do monthly updates because that seems a little more manageable. I have, however, set up an Instagram where I’m sharing more regular updates, mostly in the form of videos. 

So, where are we now? I think I last left off sharing the excitement of installing veg boxes in our garden – oh, how much further we have now come. Since this time, we have:

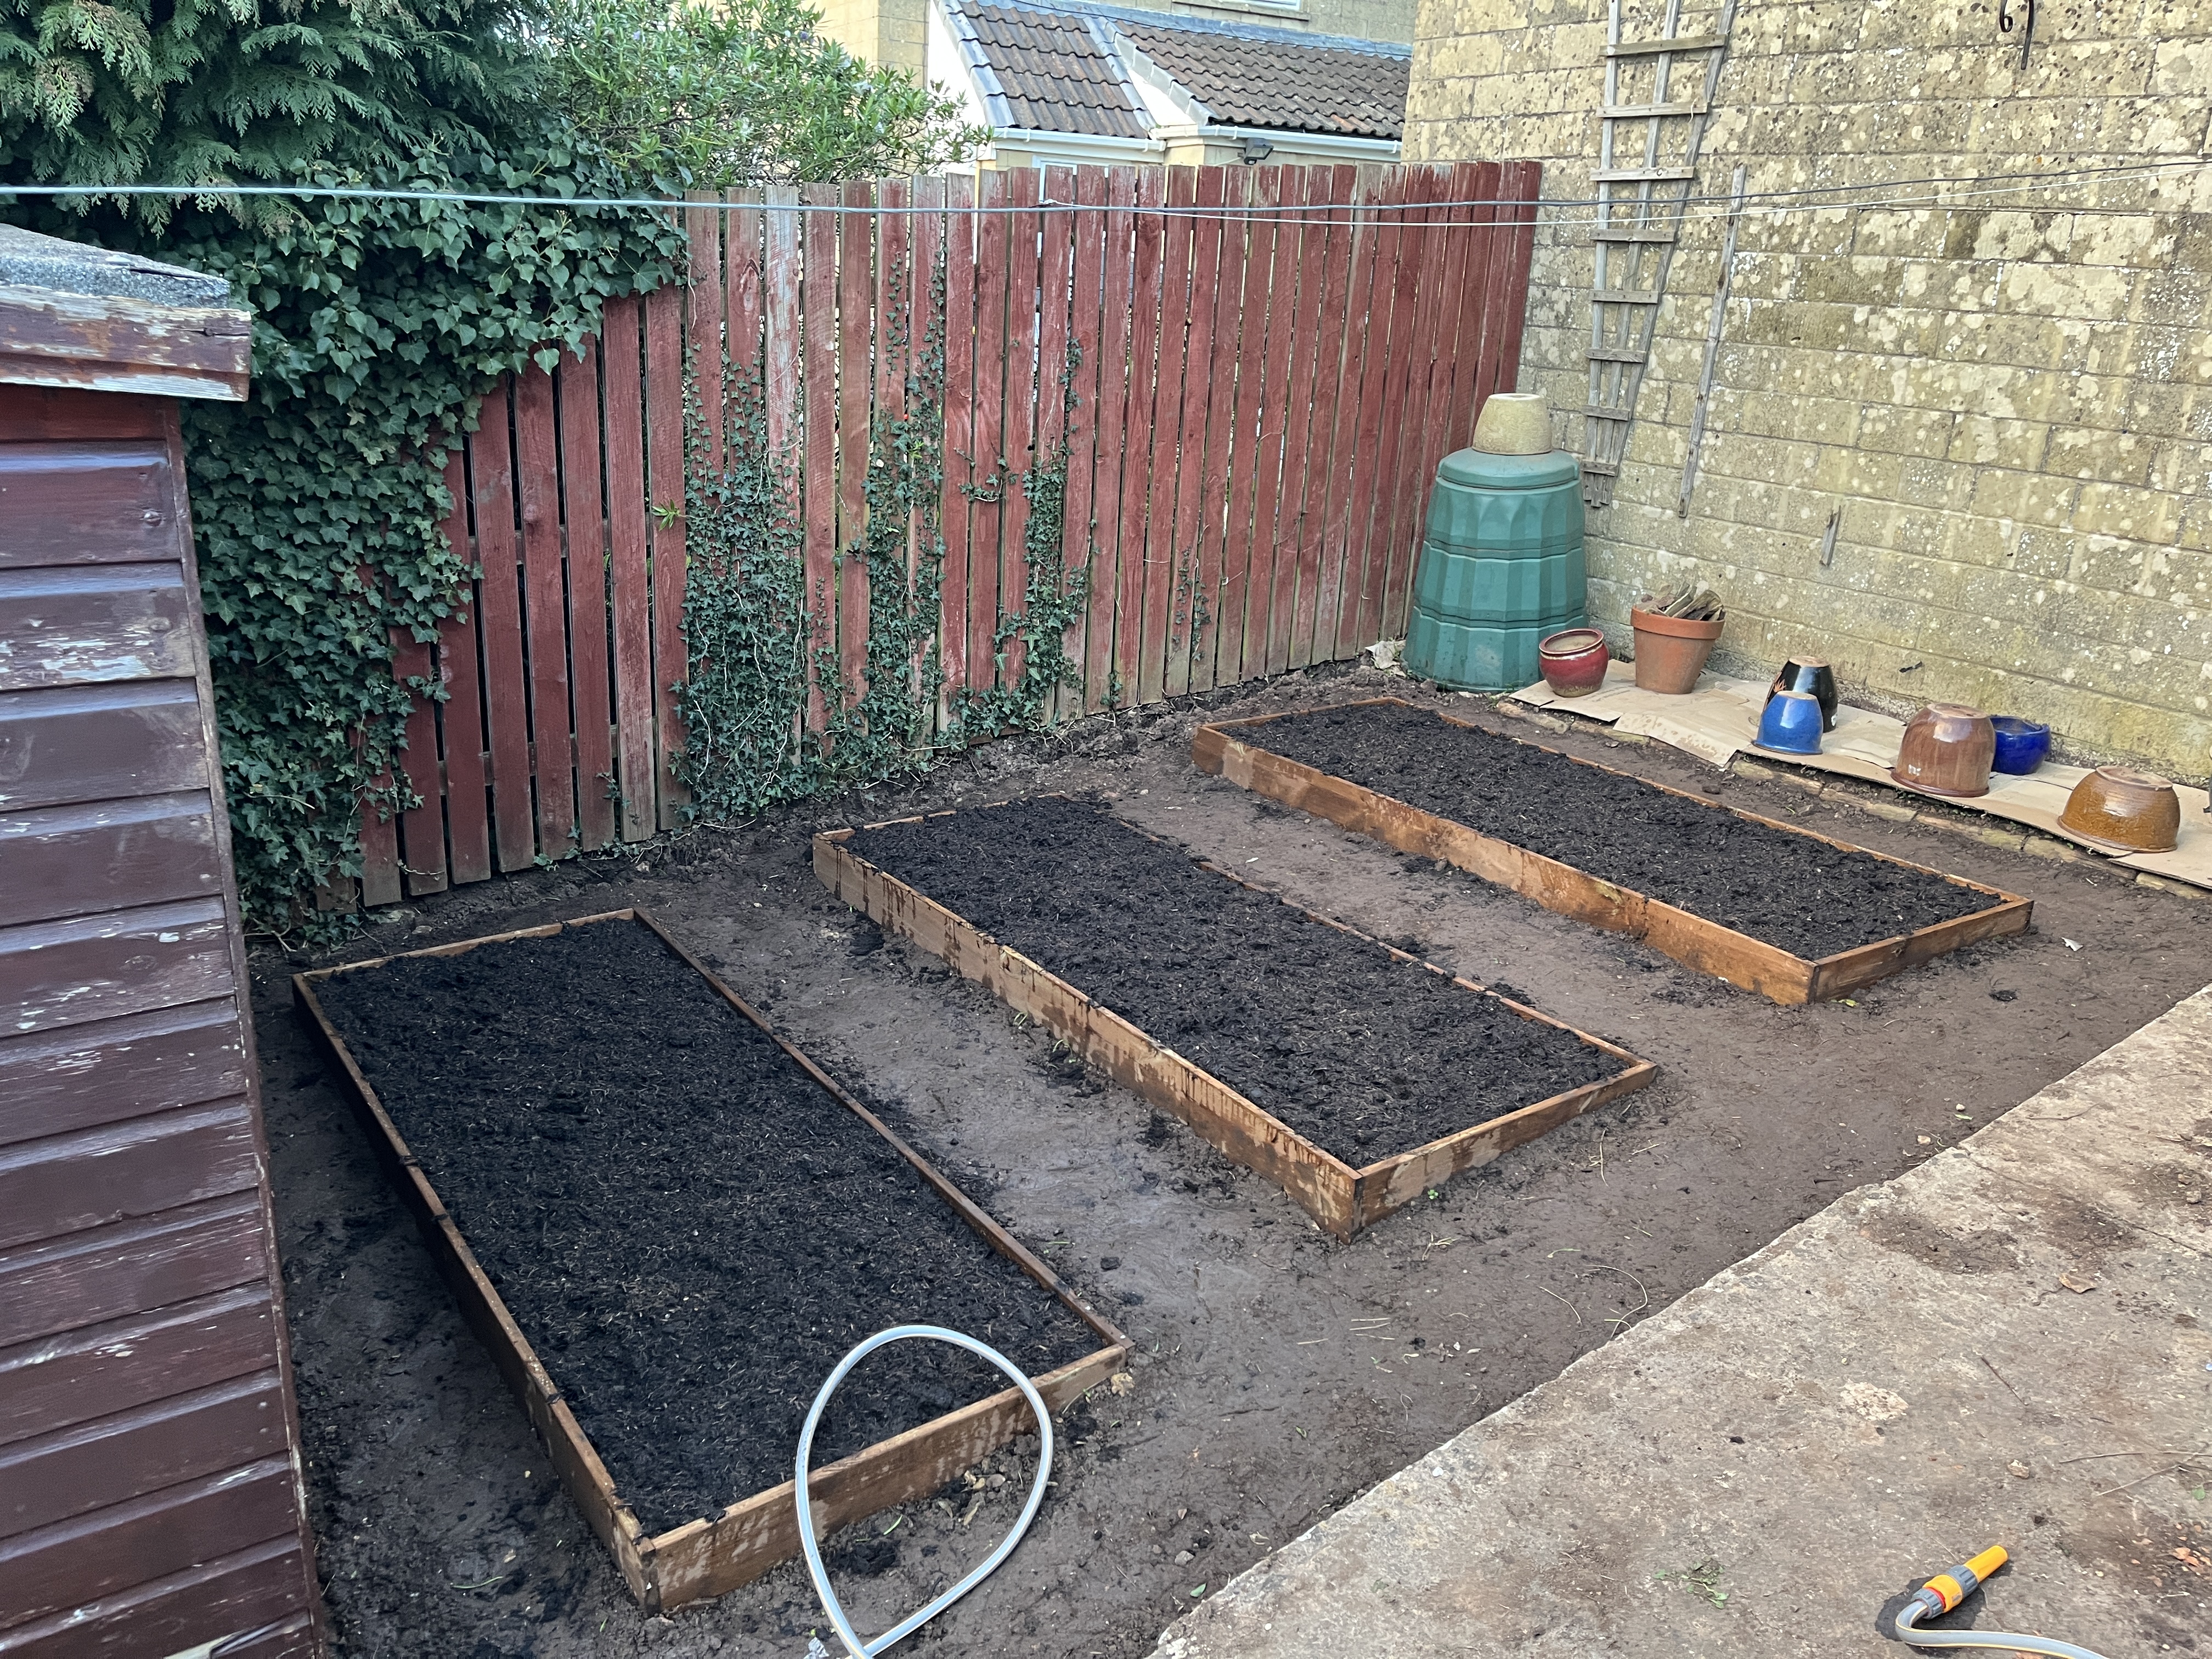
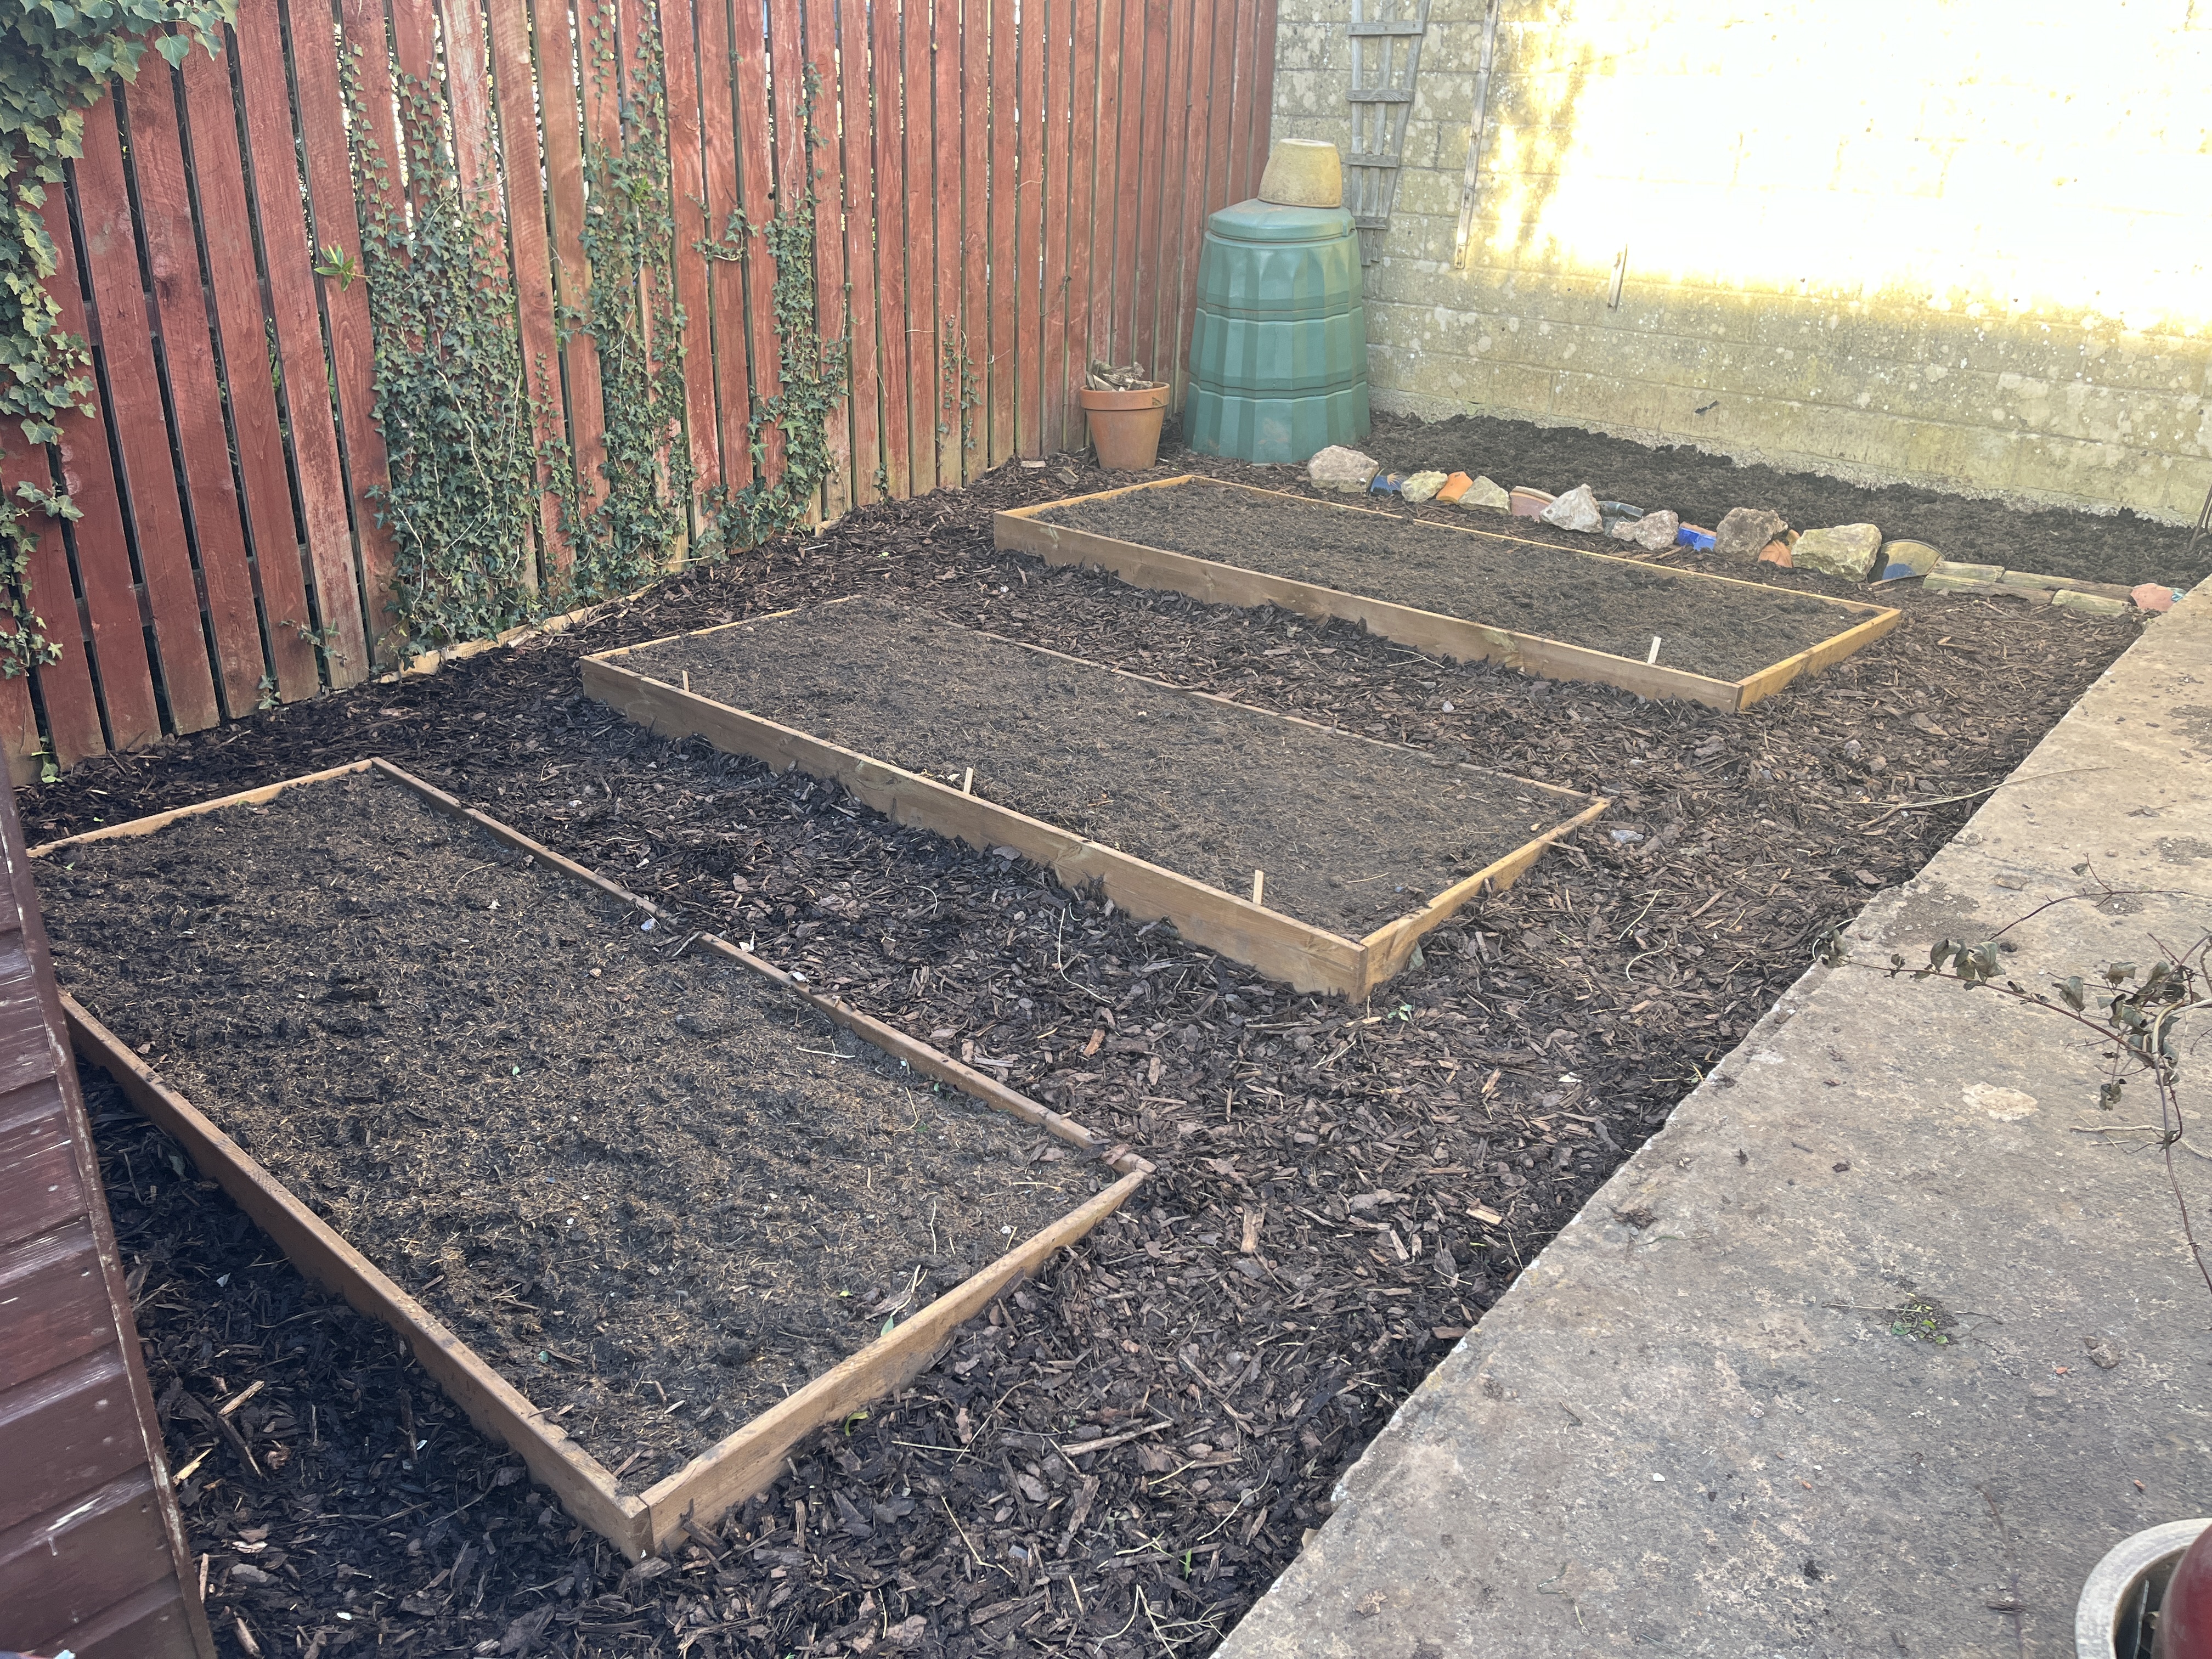
  • Filled the veg boxes with prepared soil 
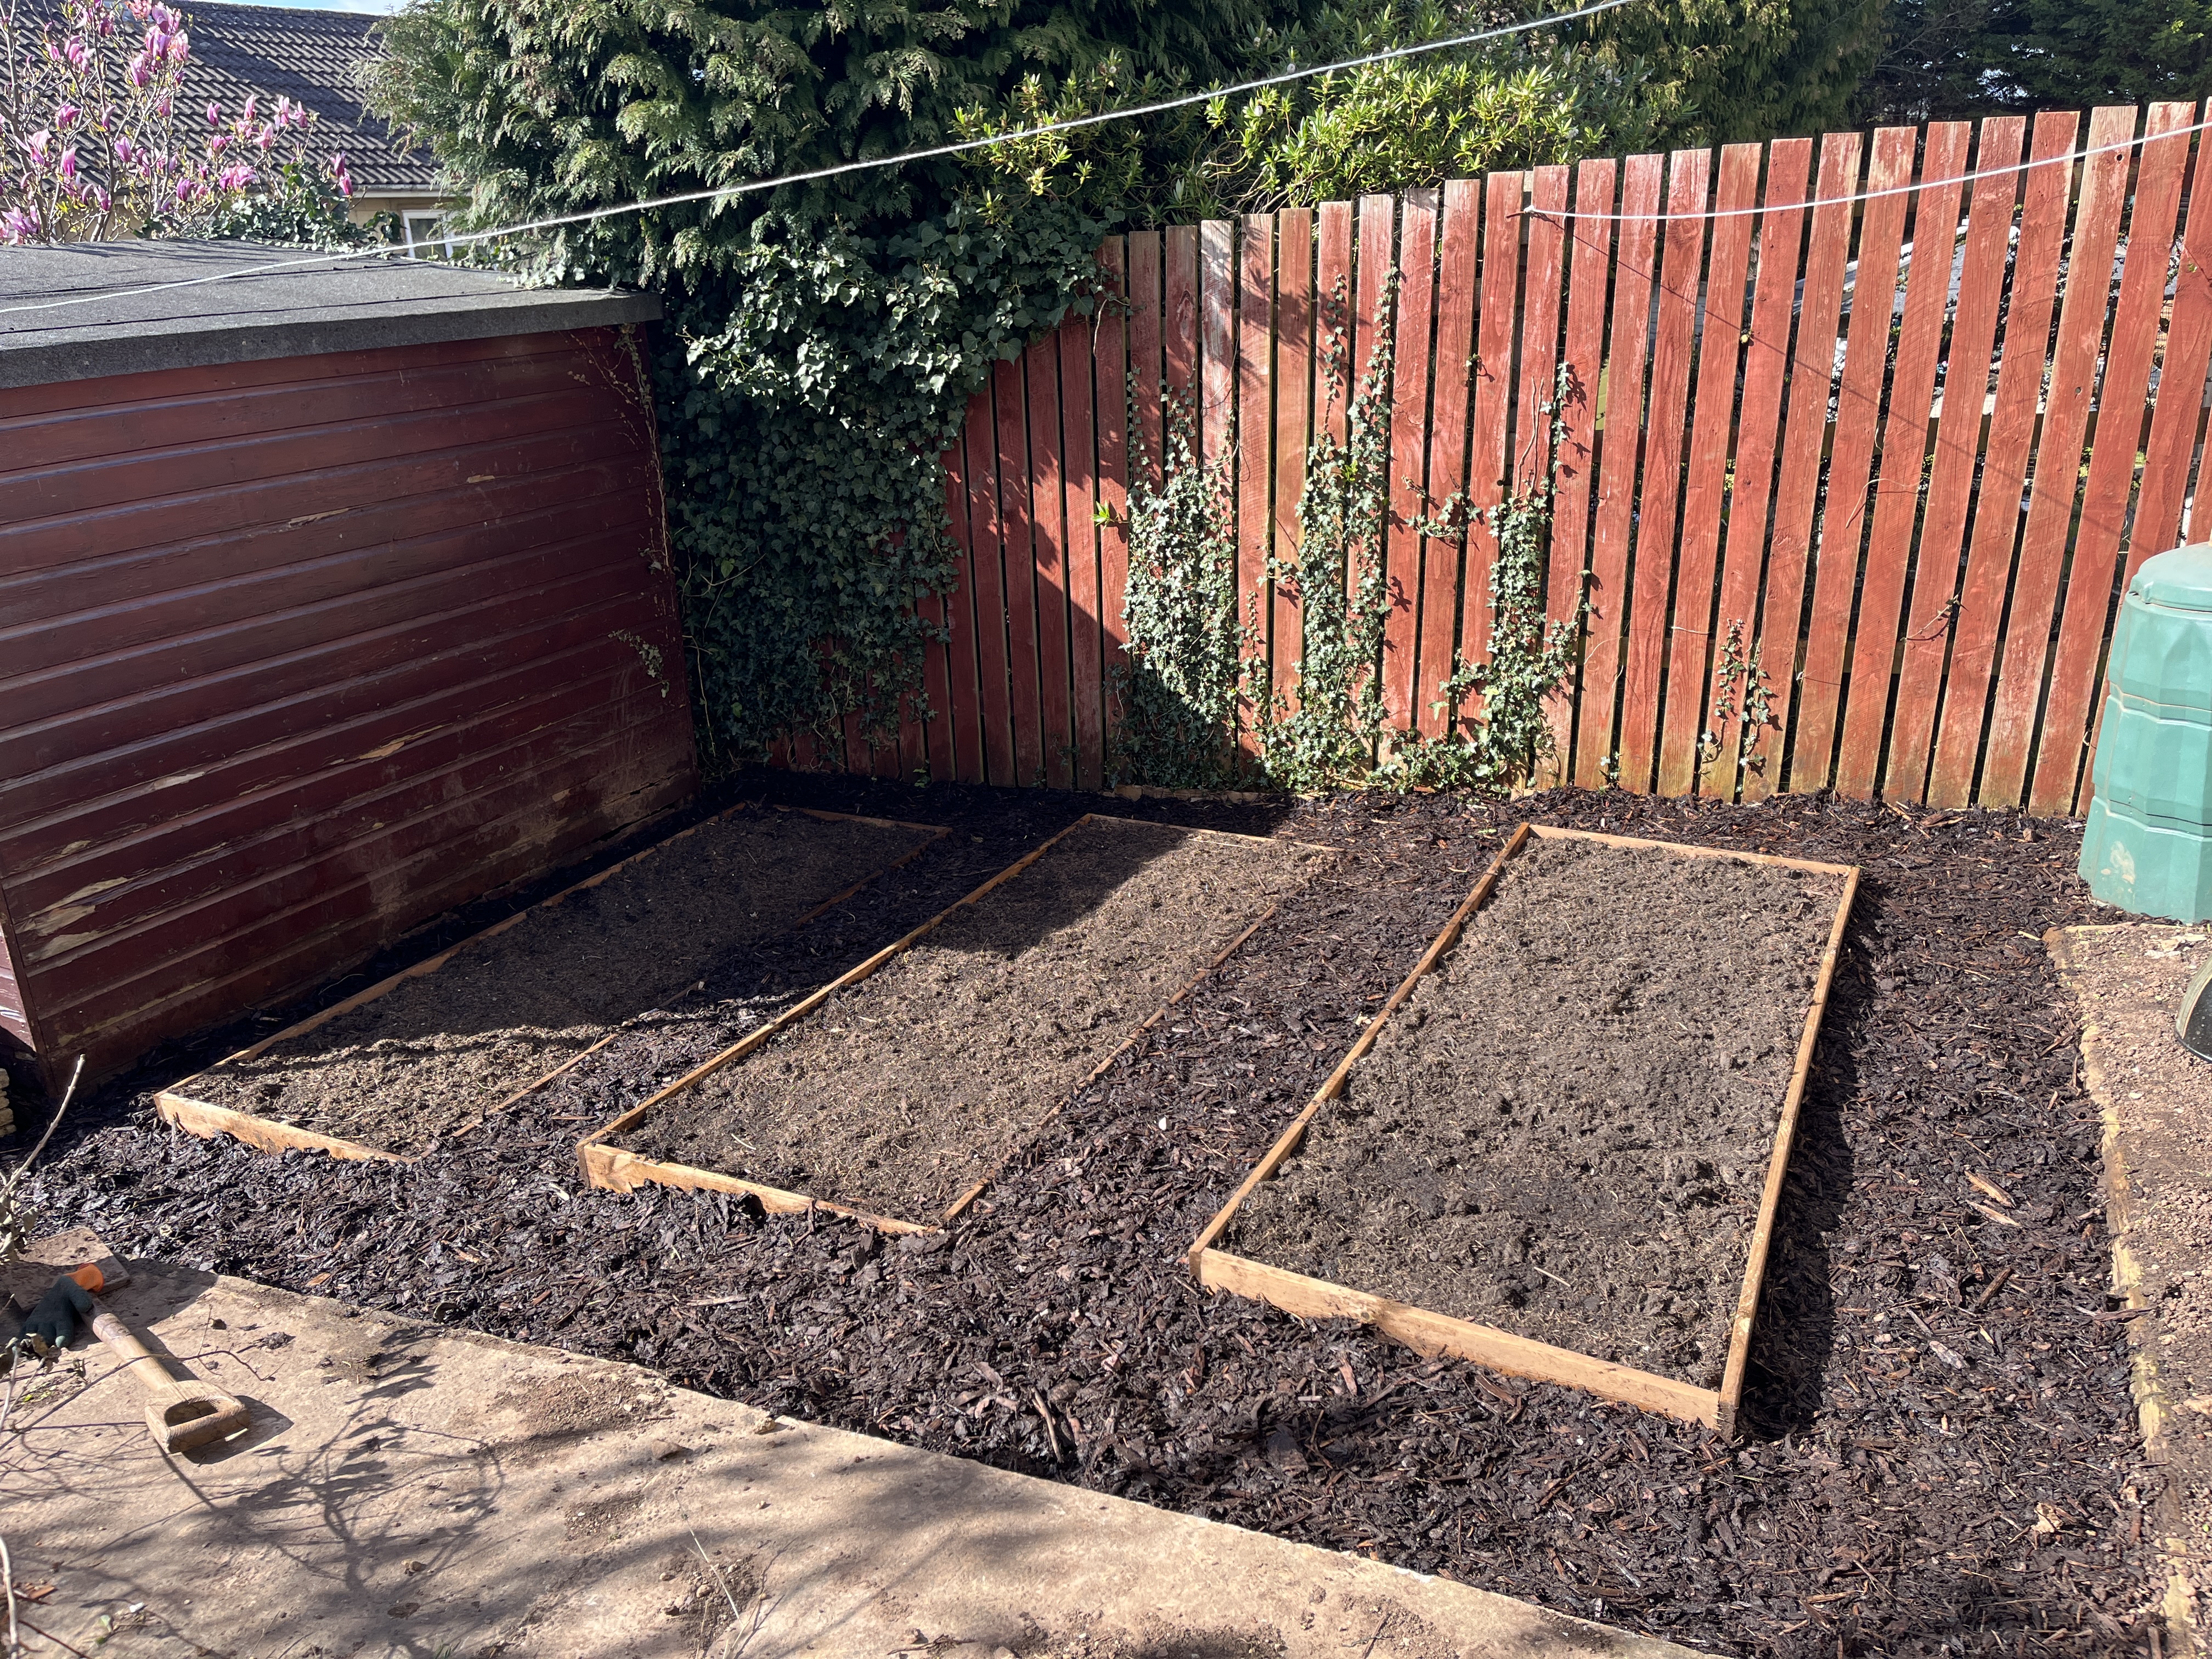
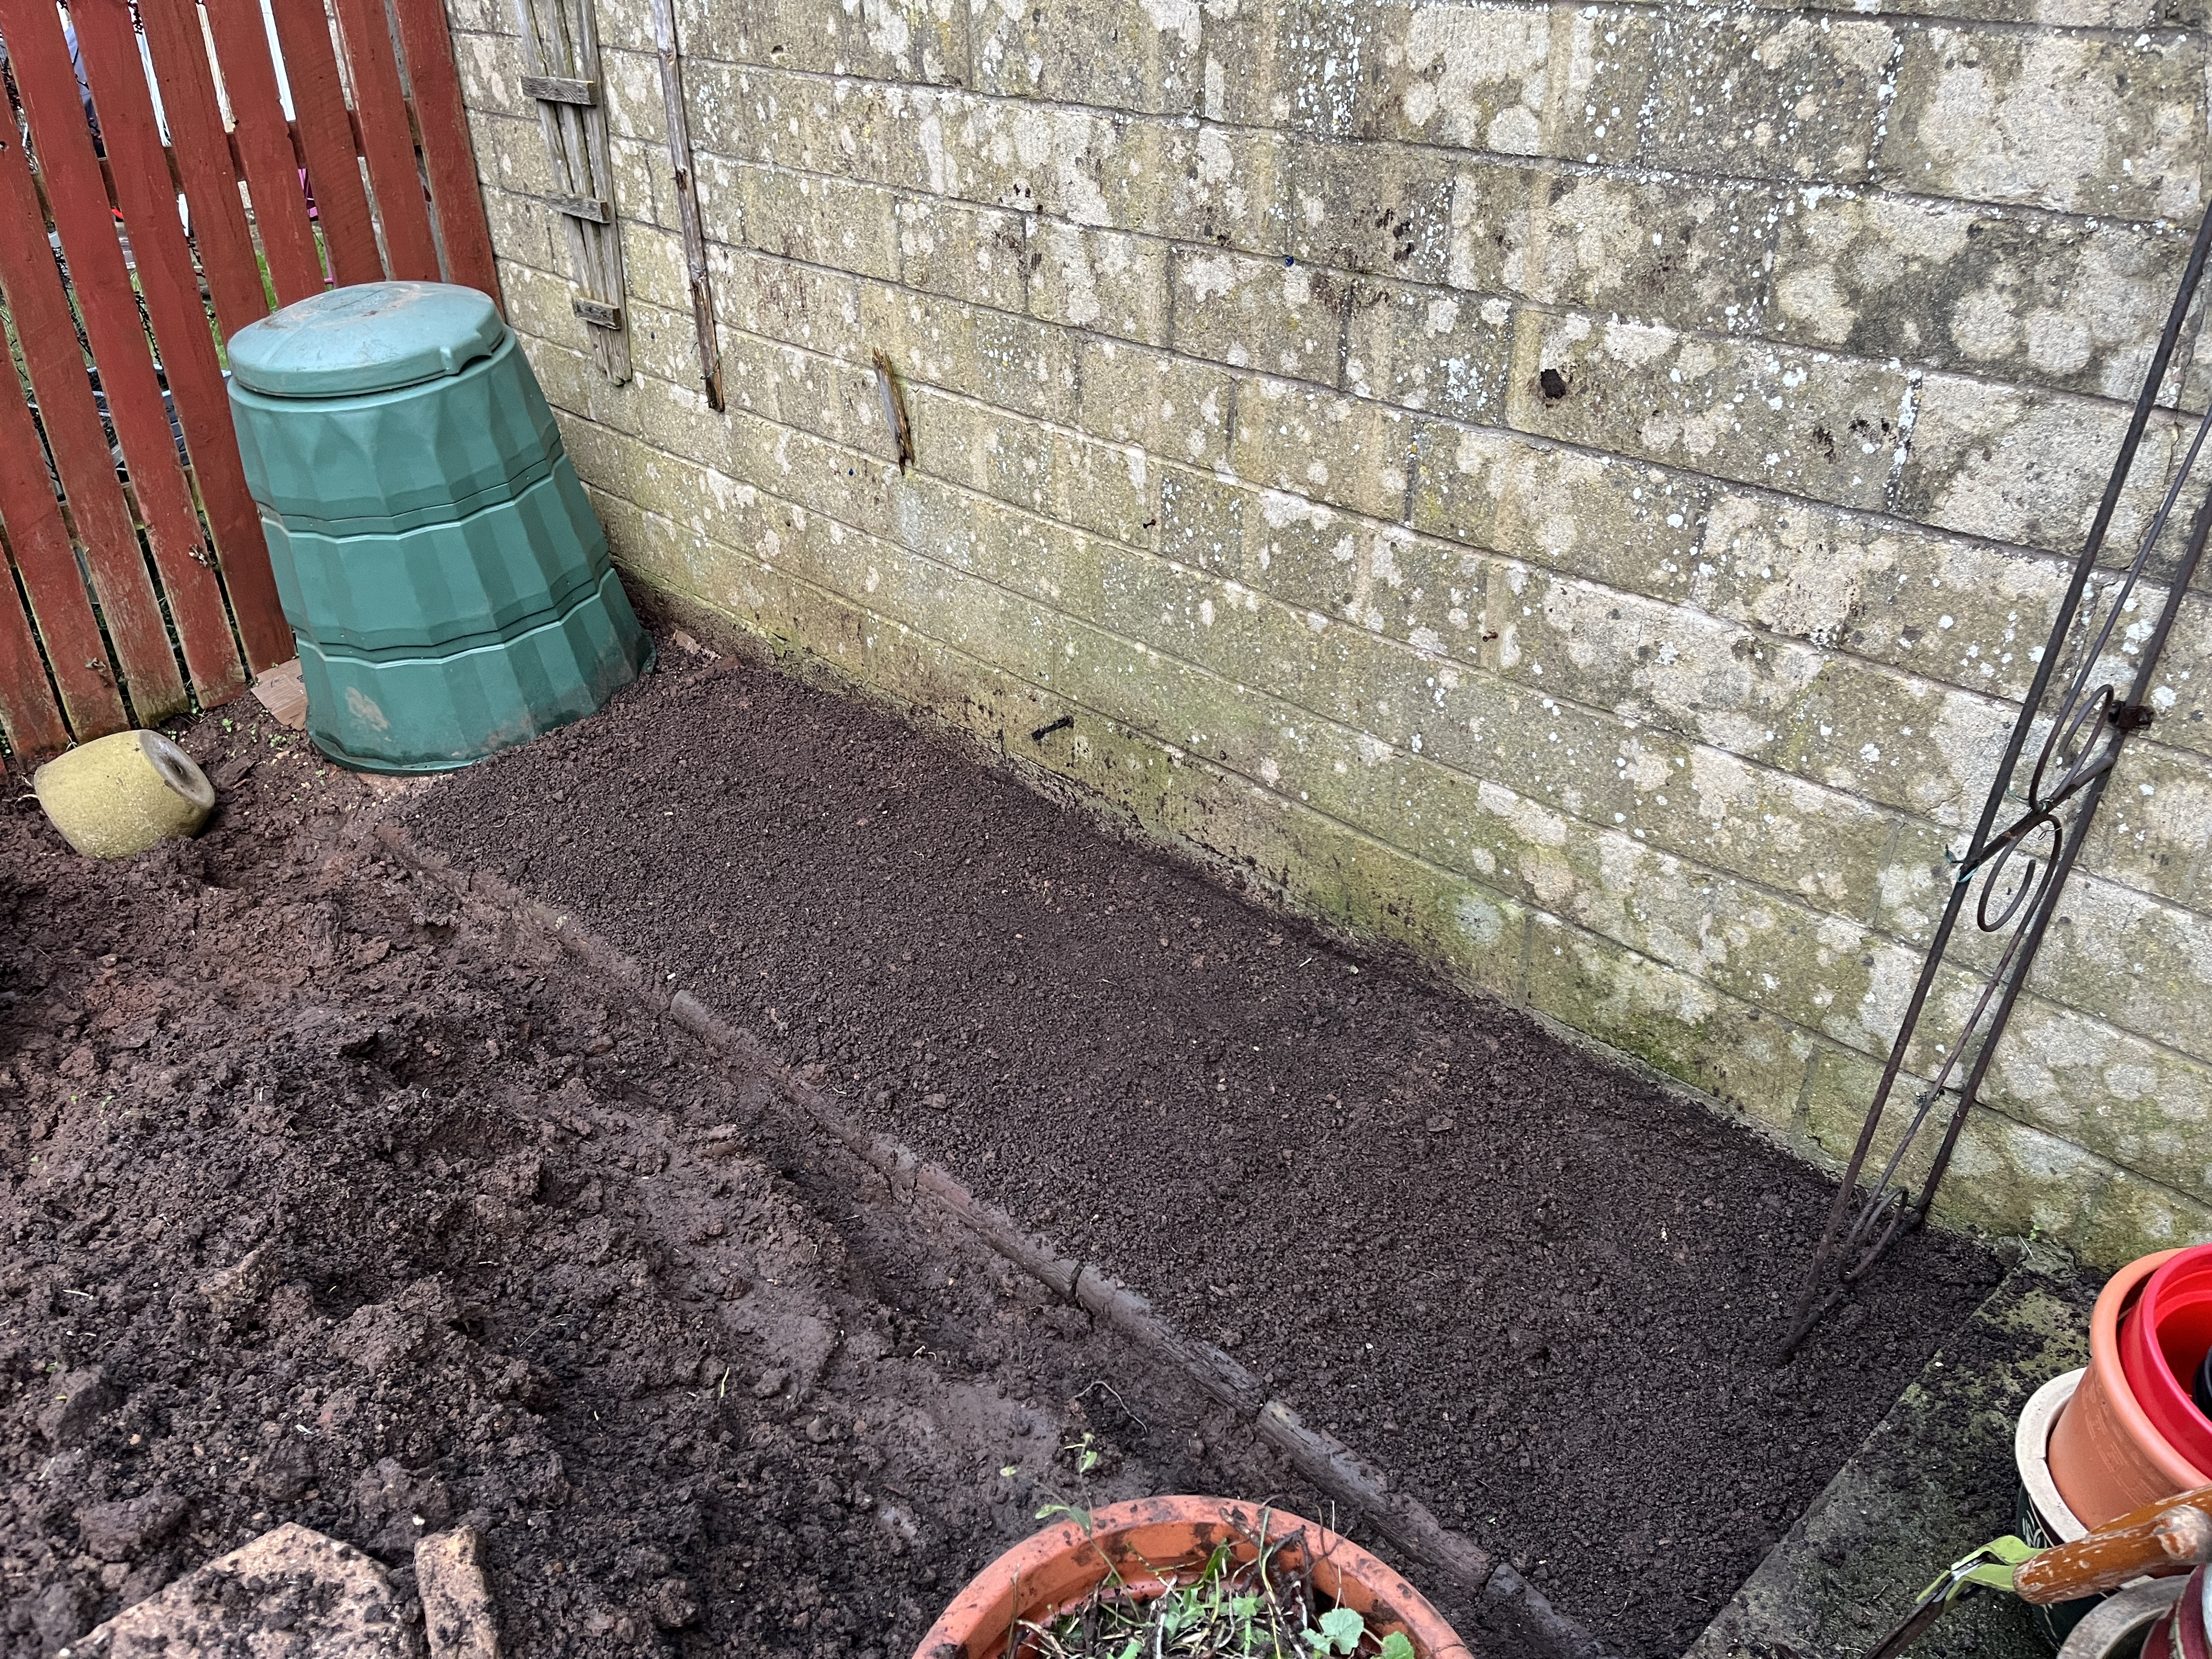
  • Added a bark chipping path around our veg boxes
  • Started planting vegetables!

So I’ll give a brief update on each, and then share some photo updates.

Filling veg boxes with prepared soil

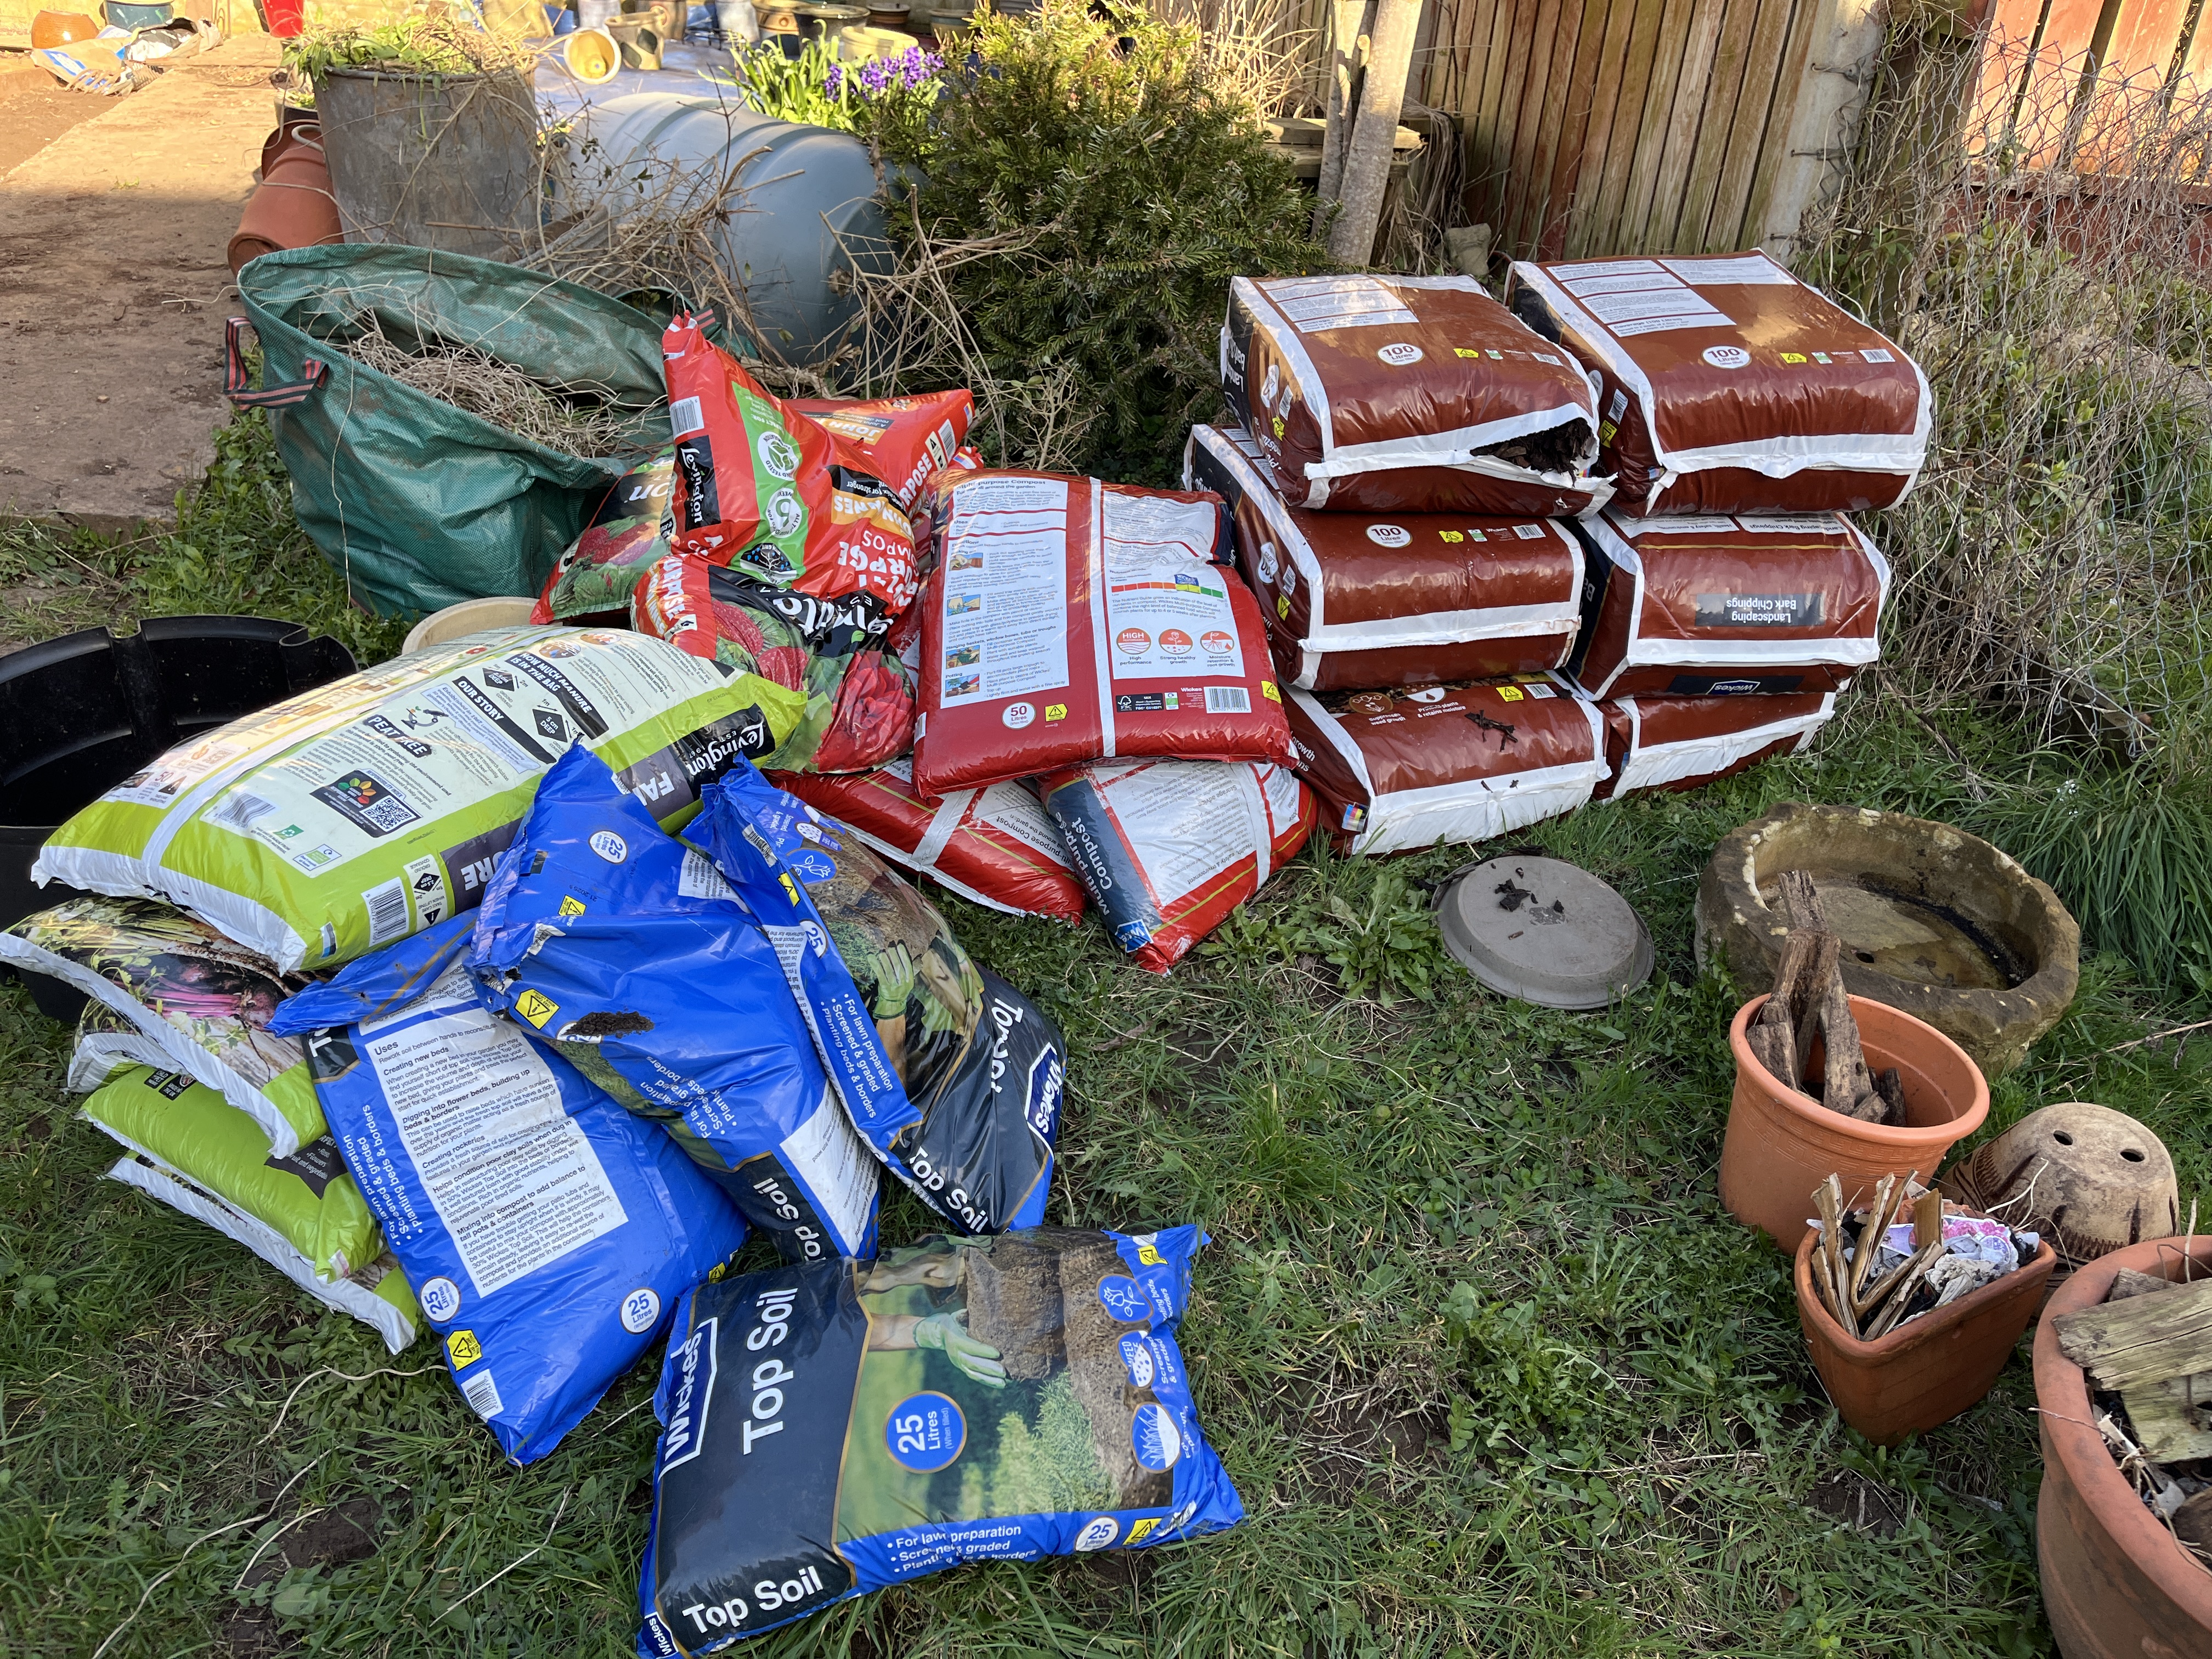
Ingredients list for three 2.4m x 0.8m veg boxes: 

  • 5 x 50l bags of well-rotted manure 
  • Chicken manure pellets (3-4 handfuls per veg box) 
  • 9 x 50l bags of multi-purpose compost
  • Lots of water 

A lady at church gave some really helpful instruction for preparing the soil for our veg boxes, and also gave us a couple of bags of turf (enough for about one and a half of our veg boxes). Laying the turf upside down means that the grass won’t grow into the veg but it will be good for feeding the soil and retaining moisture. 

I was going to write a little step-by-step of how I laid it, but it would have been rather repetitive! Essentially, after laying the turf, I added each layer in the order of the ingredients list, and then gave it plenty of water – and voila! 

Anyway, here’s the little video I made of the process on Instagram:

Adding a bark chipping path around our veg boxes 

Not only is this path aesthetically pleasing, the hope is that it will keep weeds away too. Plus, bark chipping is good for paths because it breaks down and feeds back into the ground, promoting good soil health. However, I think it will need topping up every couple of years.

We’ve also done this plastic free. Rather than putting a plastic weed membrane beneath, we put a couple of layers of cardboard to try to block any lingering weeds. Again, using cardboard instead is supposed to be great for soil health as it decomposes and goes back into the ground.

We used 5 and a half 100l bags of bark chipping. The leftover chippings were great to use as mulch when planting our hydrangea into the ground. 

(Finally) planting vegetables!

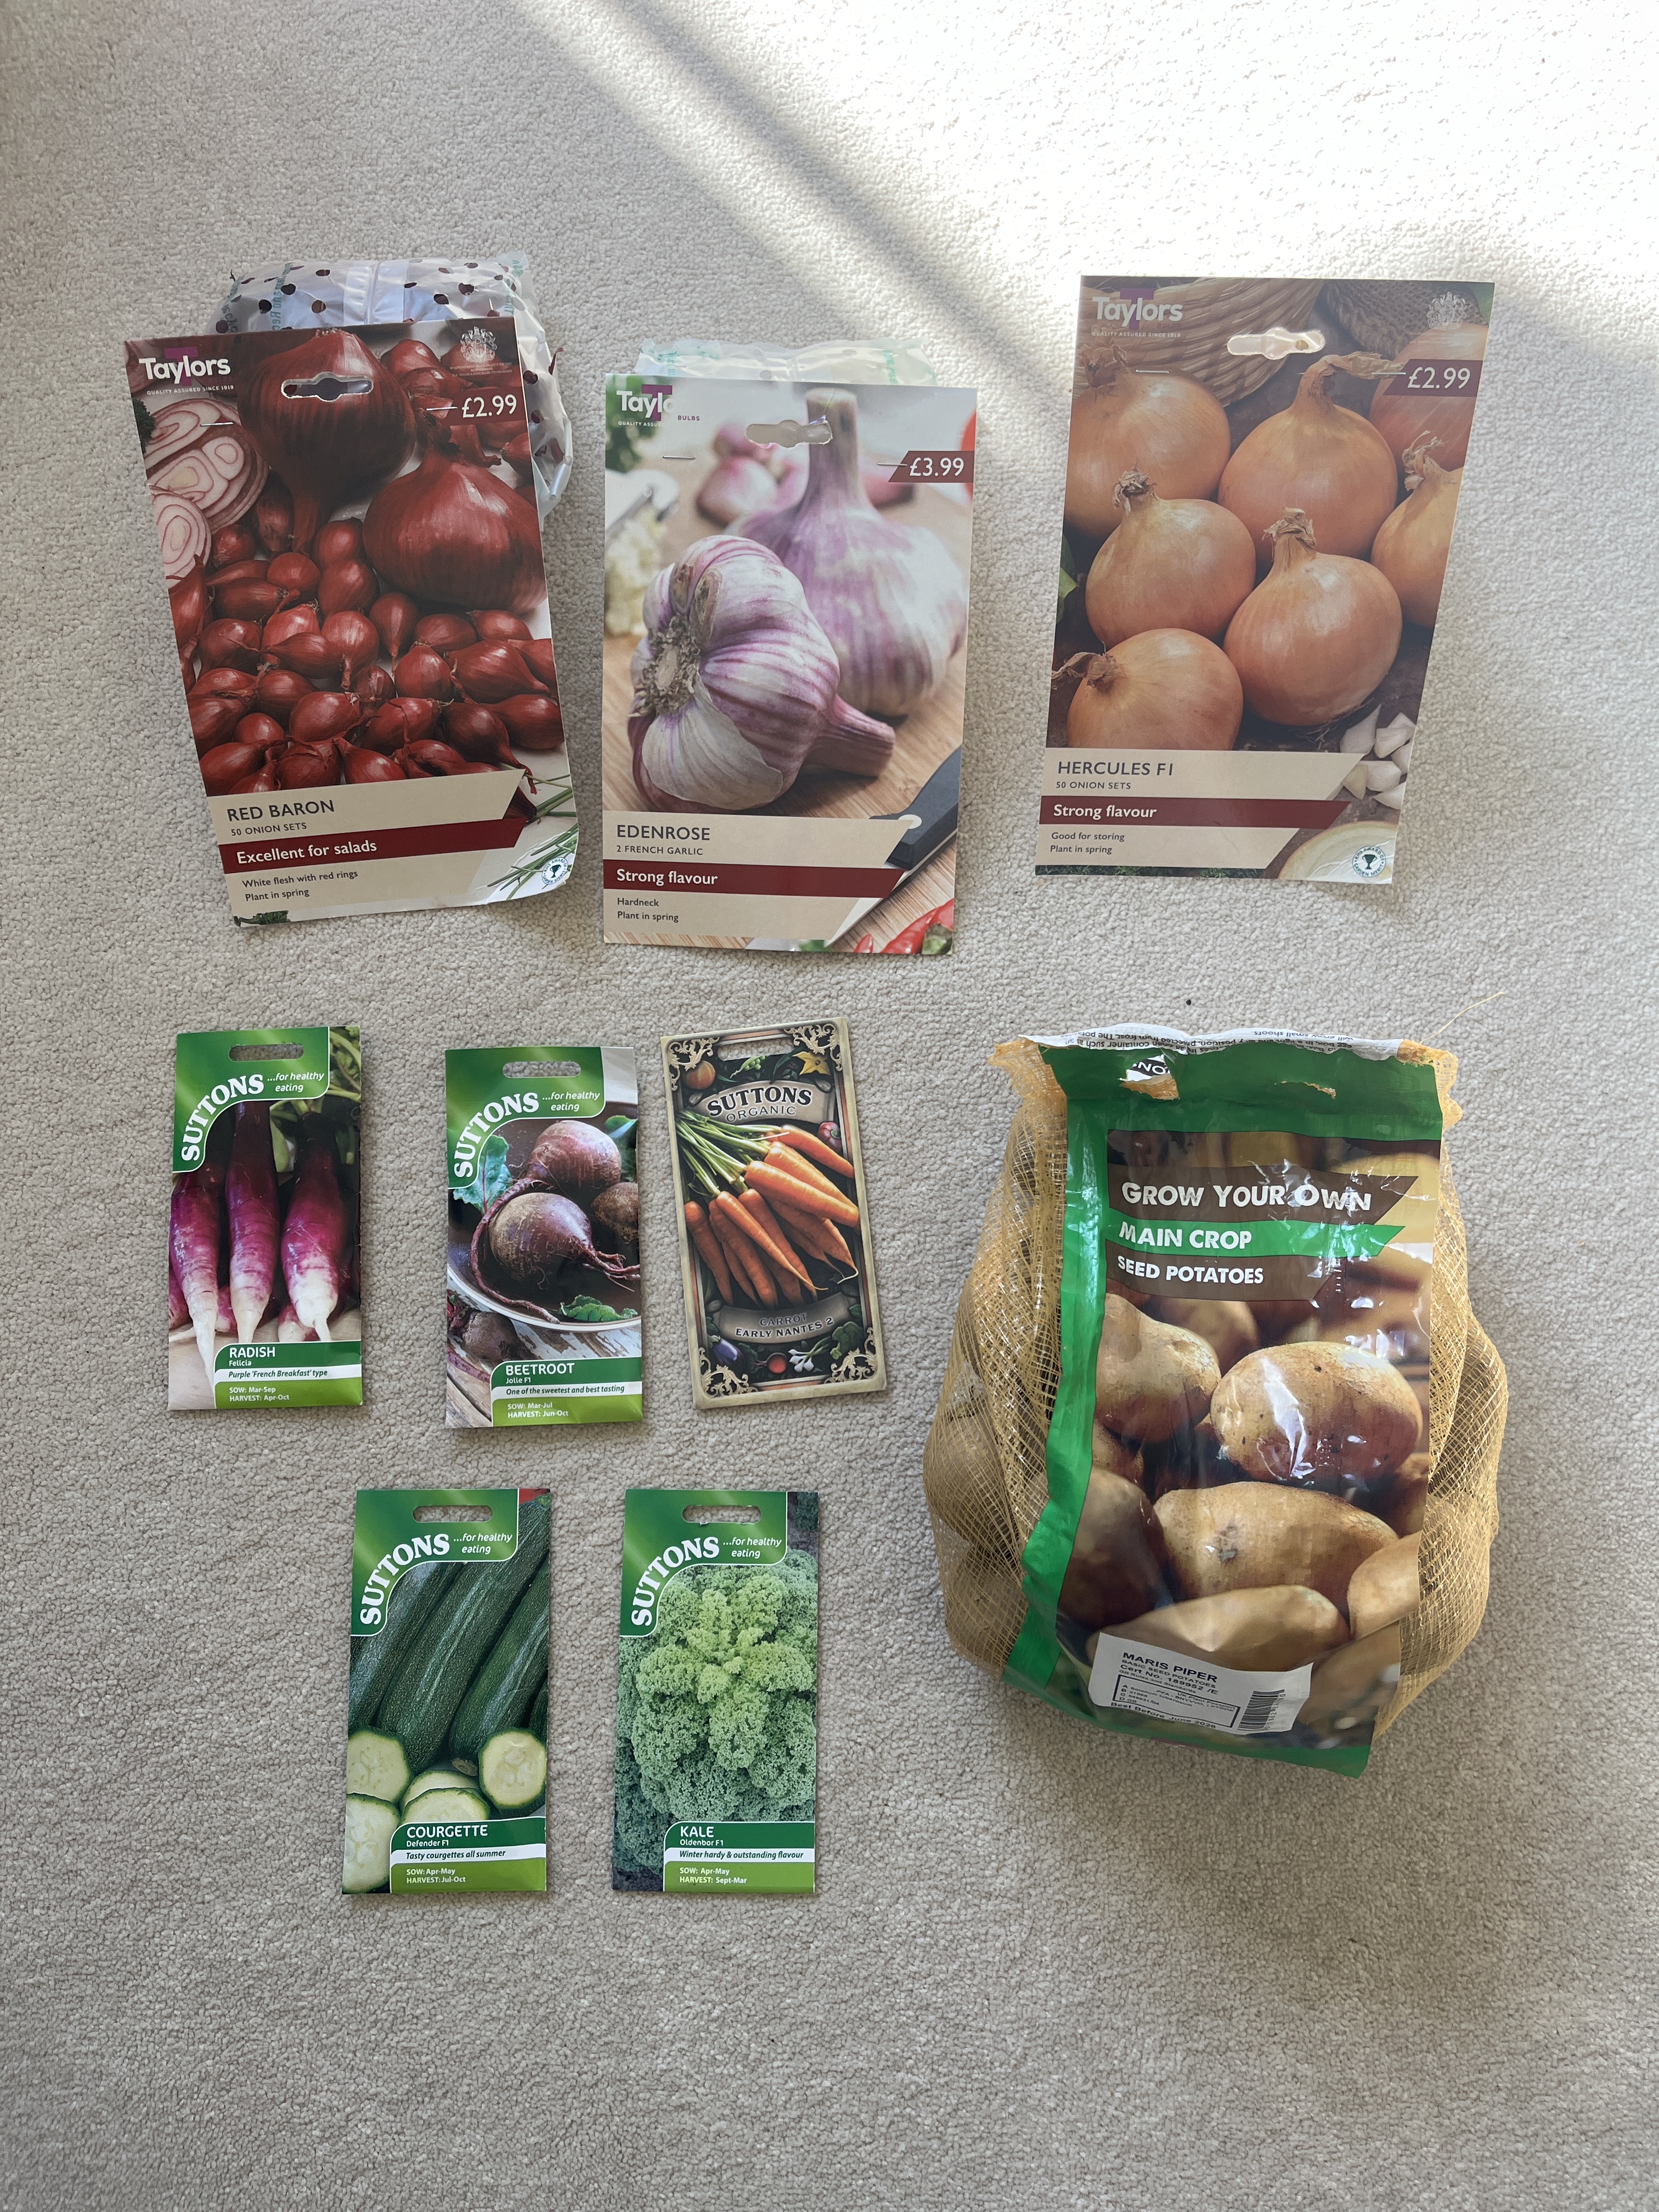
Very, very exciting indeed – we actually have vegetables planted. Well, bulbs and seeds of vegetables anyway. At the moment, we have them in three different places – in the ground, in containers, and in seeds trays germinating indoors. 

In the ground: 

In veg box one, we currently have beetroot seeds planted and awaiting germination. We have two rows of these, planted 30cm apart. We will also be putting courgettes and sunflowers in this box. 

In veg box two, we’ve planted red onion, brown onion and garlic bulbs. There are three rows of each, and I left 20cm in between each row of onions, and 25cm in between the rows of garlic. 

In veg box three (our least sunny plot), there are two rows each of lettuce and spinach, planted 25cm apart, and one row of radishes, also 25cm from the spinach. There will also be kale in this box. 

In containers: 

We have three 30l containers. Two of these have potatoes in and one has carrots in. Potatoes are supposed to grow well in containers – I can’t actually remember why, but Shem and I watched a load of gardening videos a few months ago and this was one of my key takeaways from it! 

Planting the potatoes in this way does come with an interesting set of instructions, and we’ll need to keep adding soil over time. Initially, I started with 3-4 inches of soil, put 3-4 potato seedlings into the containers, as spaced out as possible, and then added another 3-4 inches of soil. As the plants grow to approximately 10cm, I’ll need to add more soil to the tips of the new plants, and keep repeating the process until I reach the top of the container. 

I also thought it would be a good idea to grow the carrots in a container too because the soil in our beds is actually quite shallow, just 15cm above the cardboard we laid down. I thought growing carrots in these conditions may result in a rather short produce. 

However, carrots are supposed to be sown in rows 30cm apart and the containers are only about this size in diameter. I’ve tried an interesting method with these – I actually sowed the seeds in the shape of a cross. I’ll let you know how this goes because I have no idea if this was a stupid thing to do! 

In seed trays indoors: 

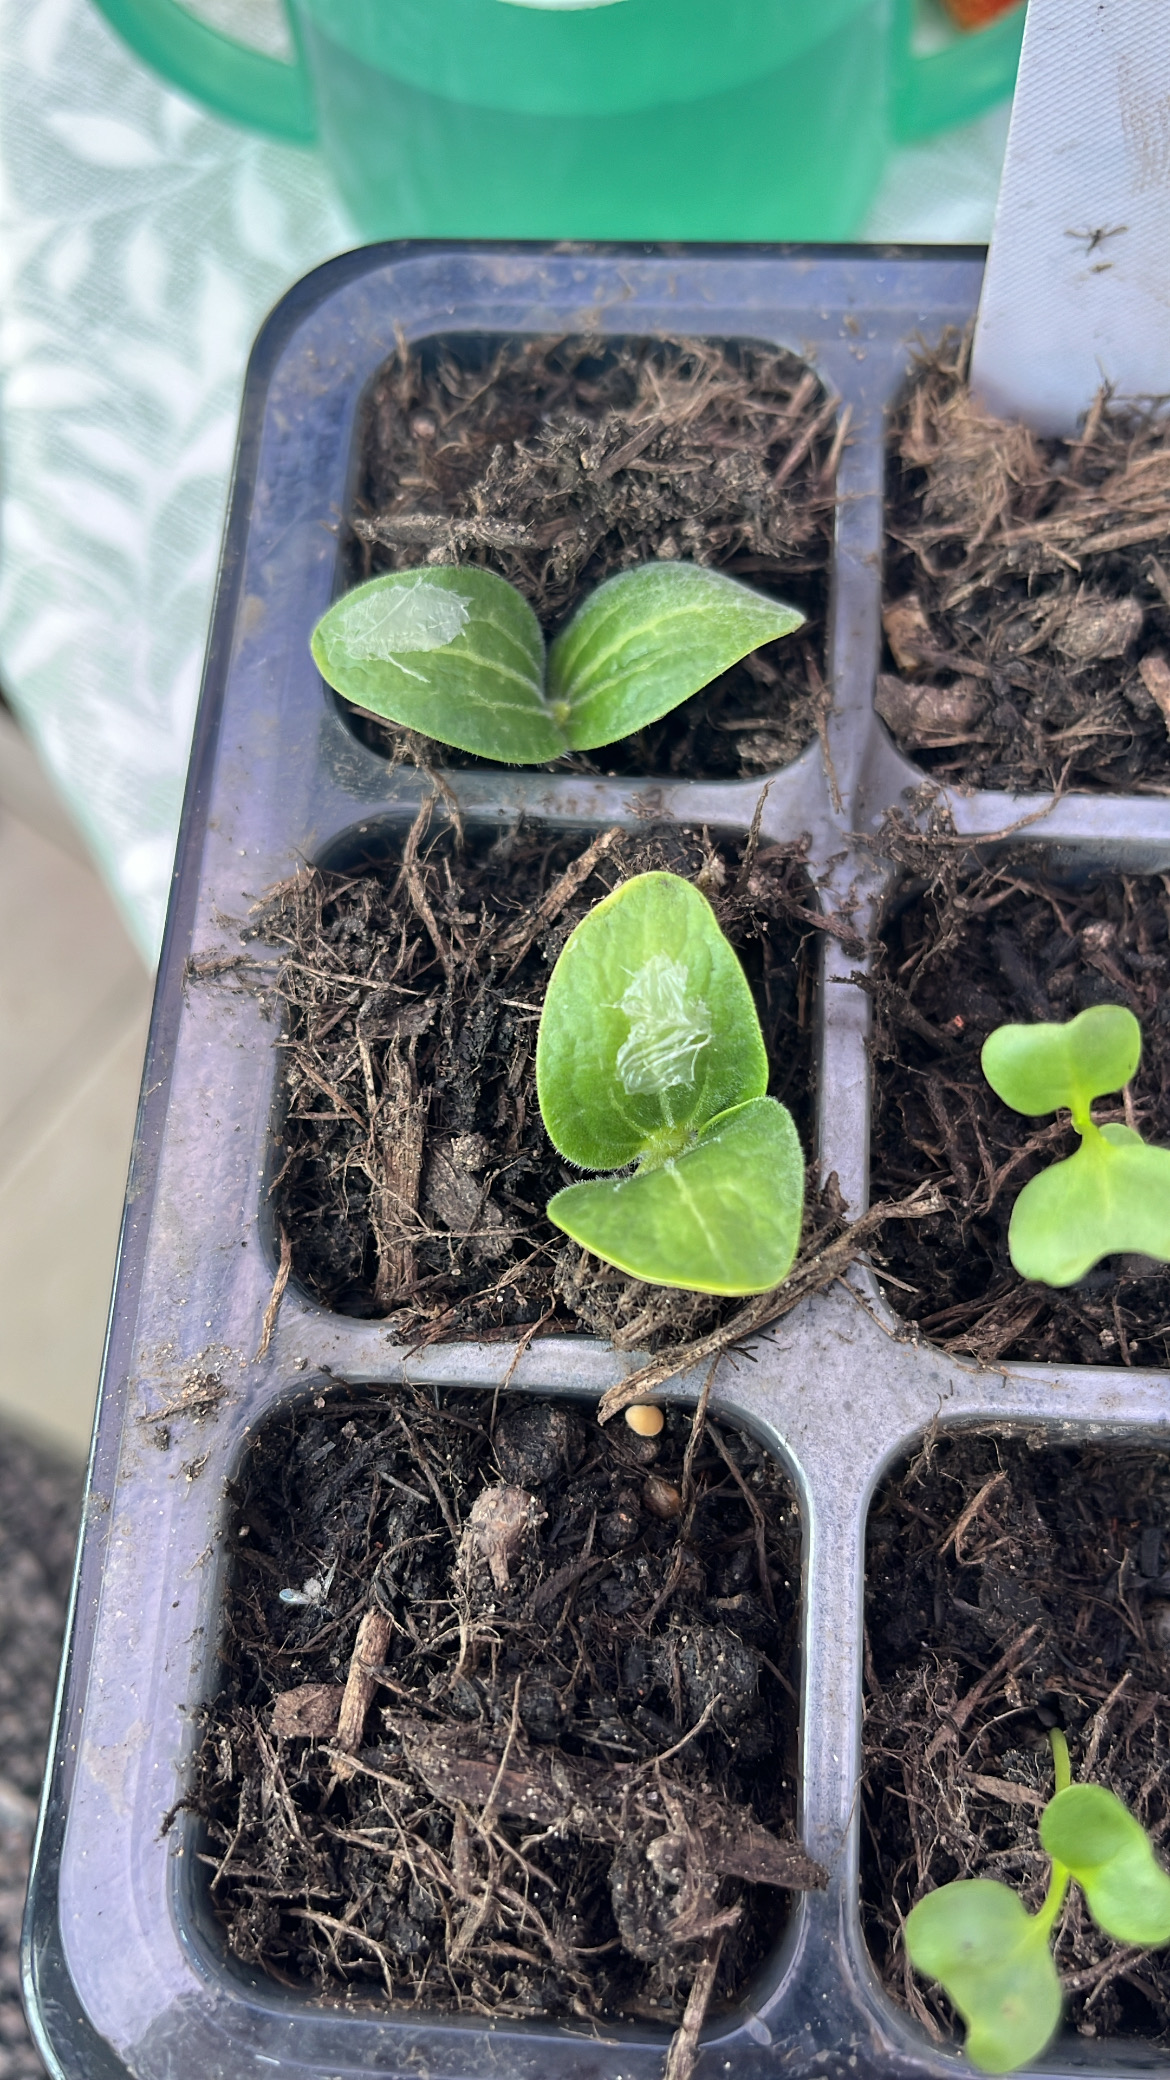
And finally, we have a few seeds starting off indoors. In eight compartments of a seed tray, there are kale seedlings growing and in the other four compartments, courgette seeds are germinating – in fact, two of the seedlings broke through the soil this morning! I’ve only sown four courgette seeds as they take up quite a bit of space, and realistically we only have room for a couple of plants.

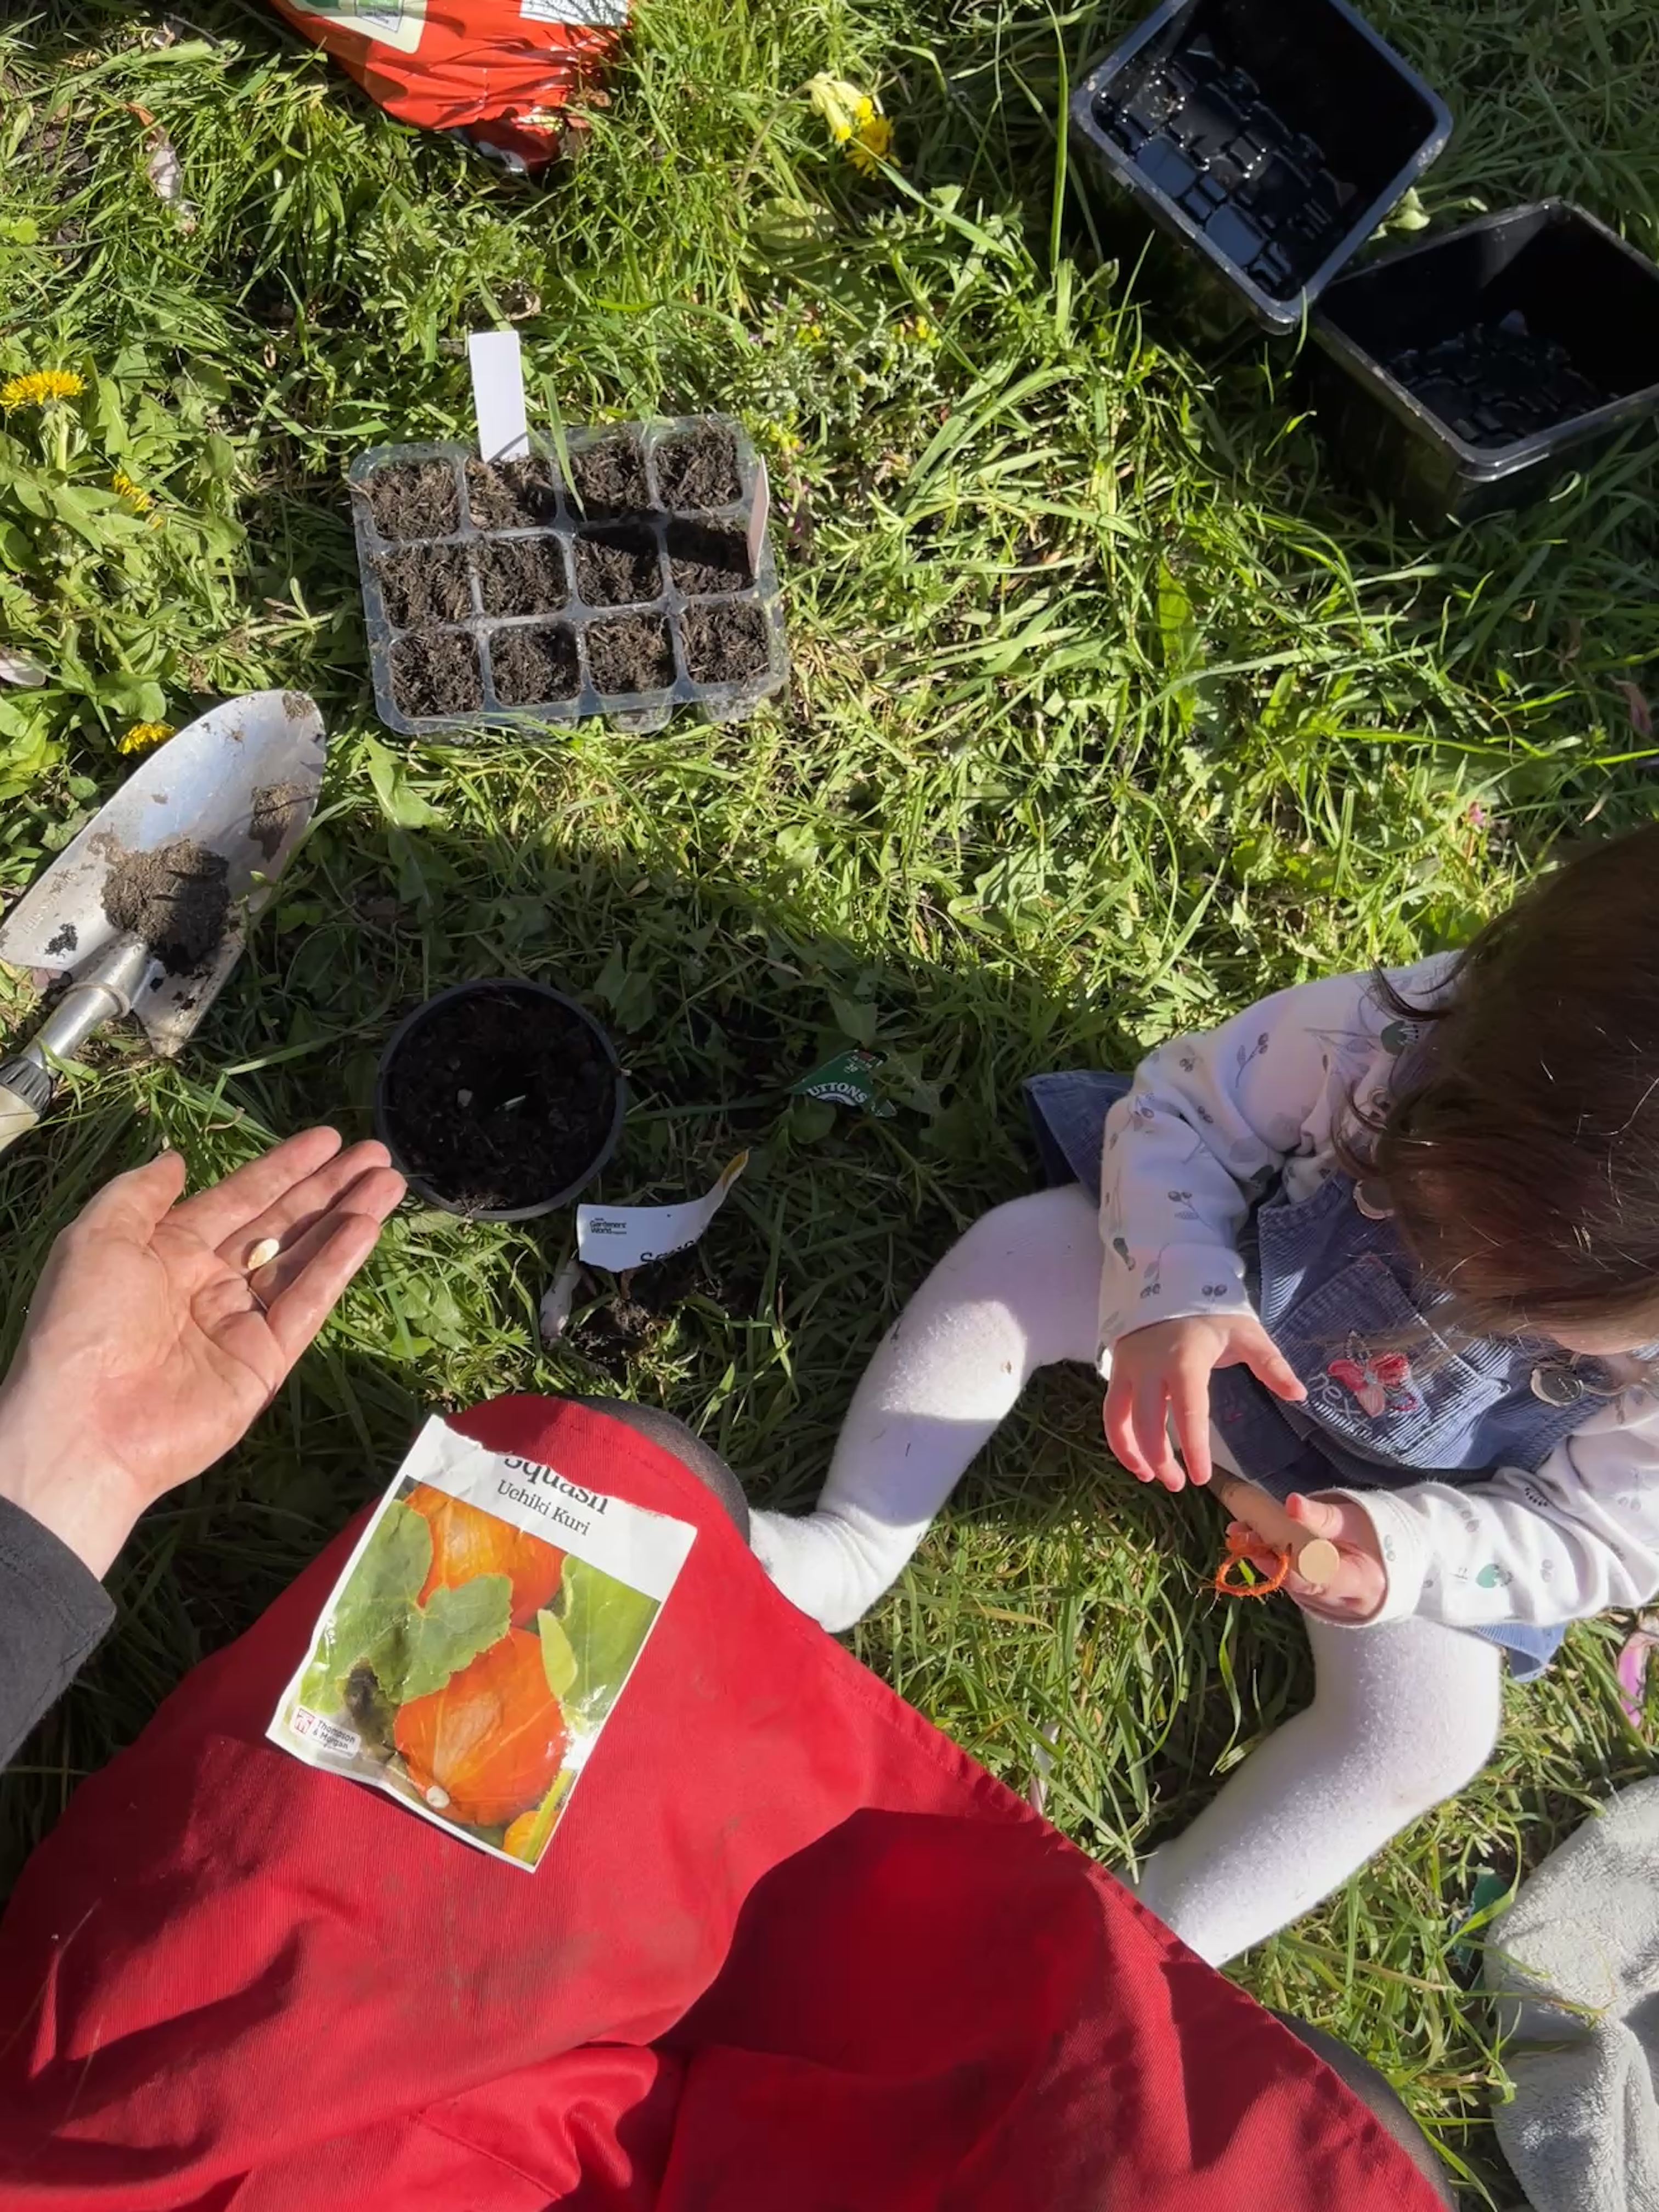
In four 9cm pots, we have squash seeds germinating. When preparing to sow, the research I did suggested it was better to sow squash in larger pots rather than the smaller seed tray compartments. Nothing has come through the soil yet though, so we shall have to see! 

Anyway, there we have it! This month’s garden update. I feel like I whizzed through quite a lot there, but honestly, I’d rather be out in the garden than writing about it!

If you ever have questions, feel free to comment below, I’d be very happy to give more detail. And if you’re on Instagram, give my gardening page a follow – you’ll get a lot more frequent updates on there! 

Also, how is your spring gardening going? Feel free to share how your garden is looking, and what you’re growing!

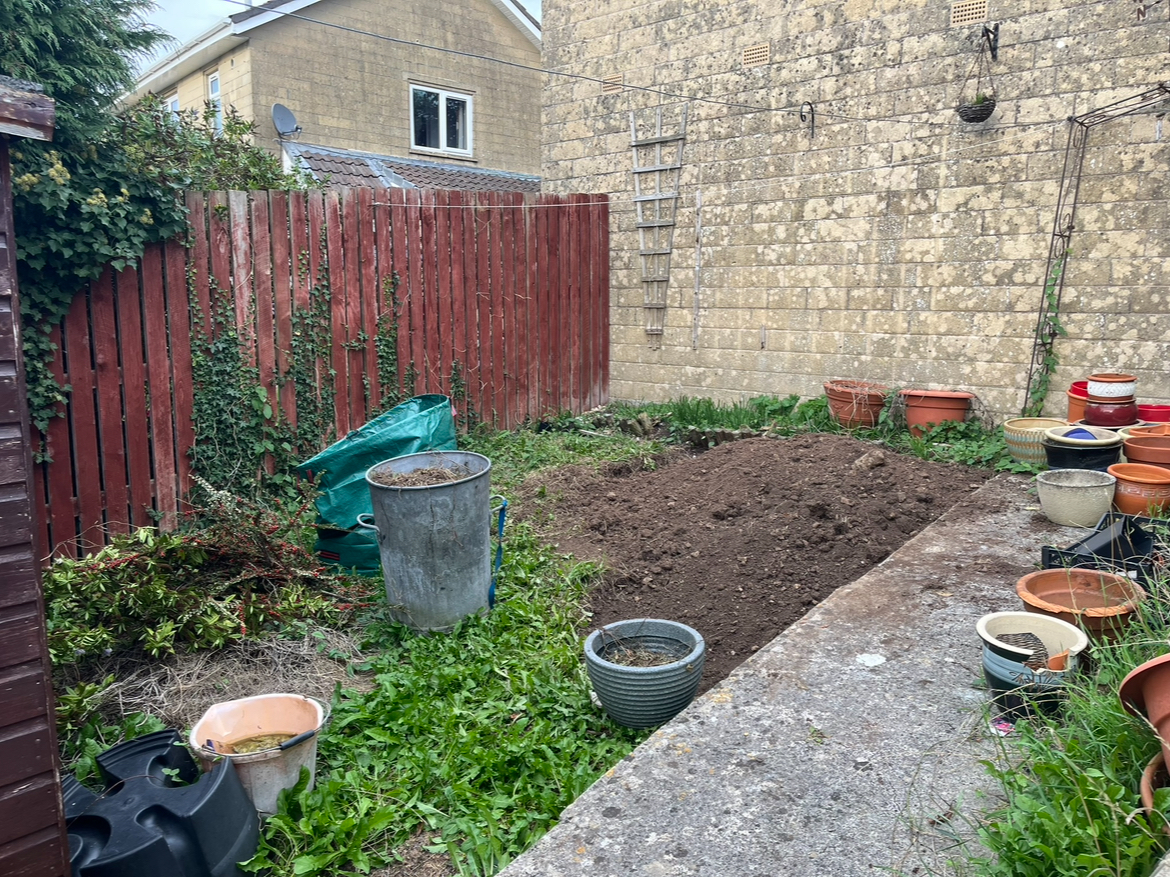
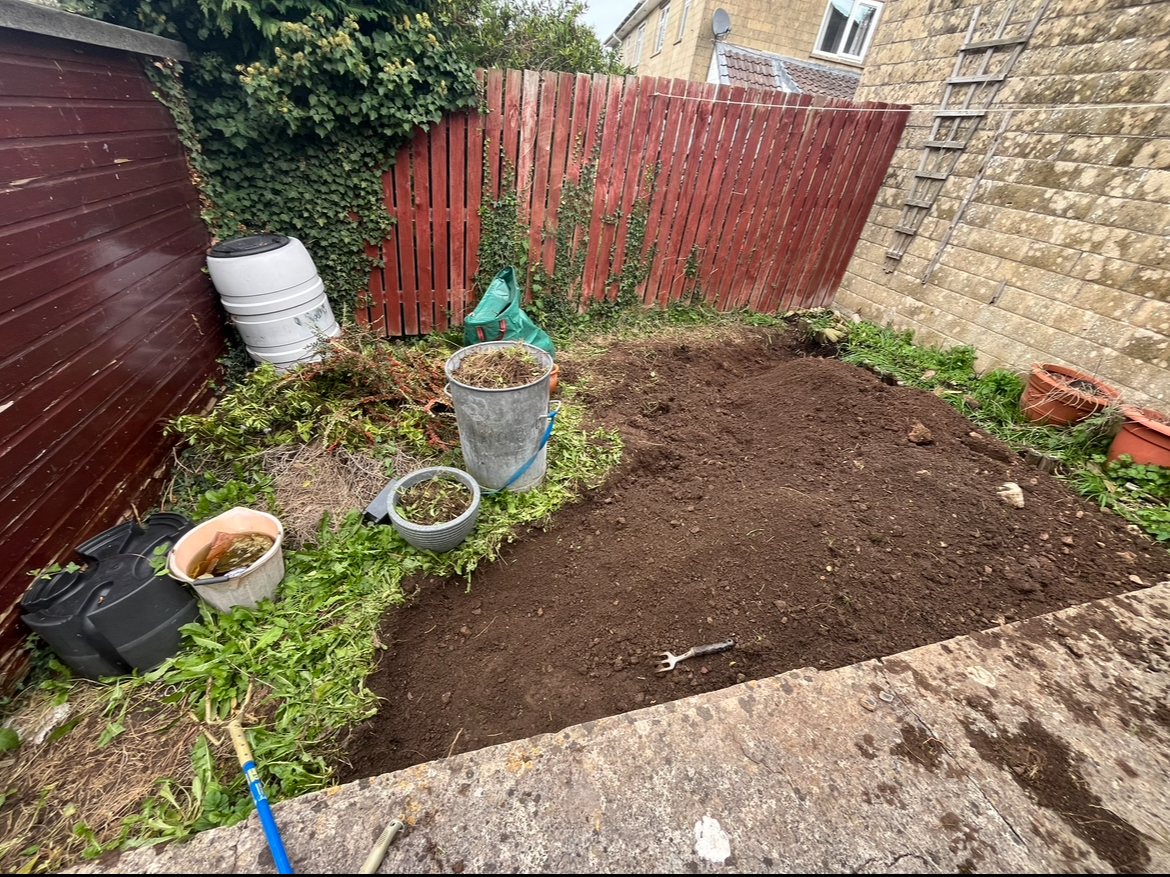
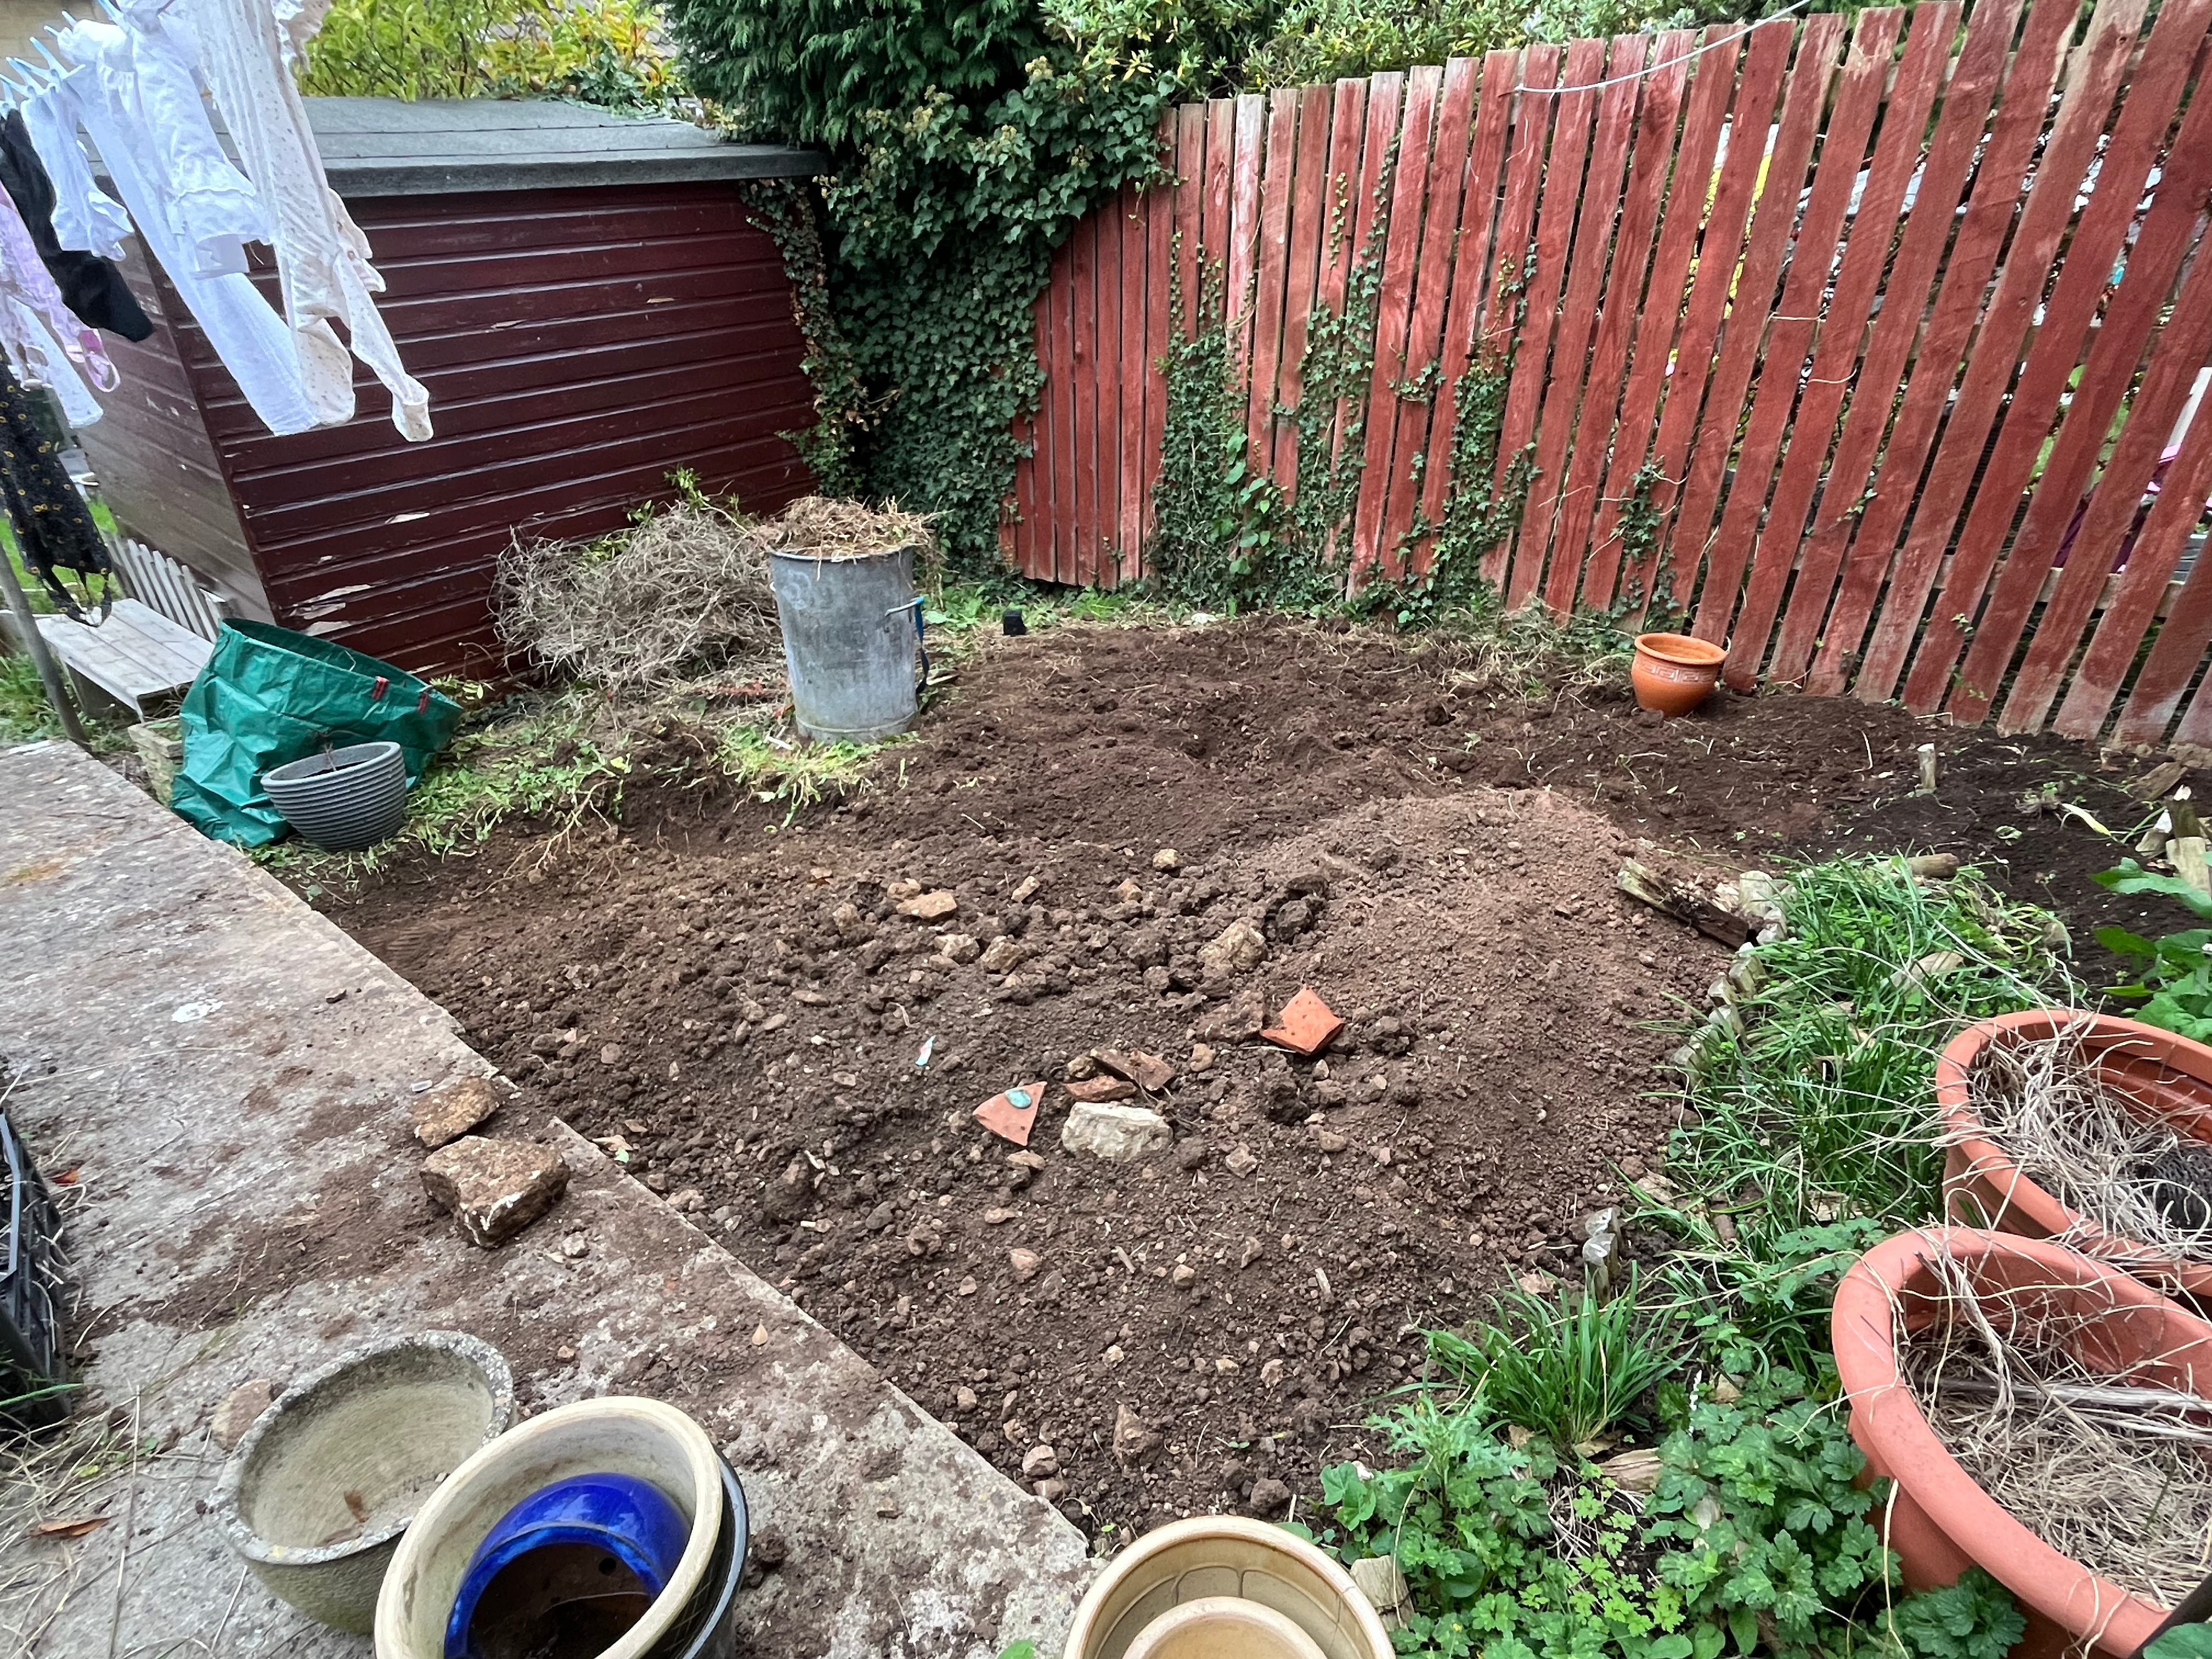
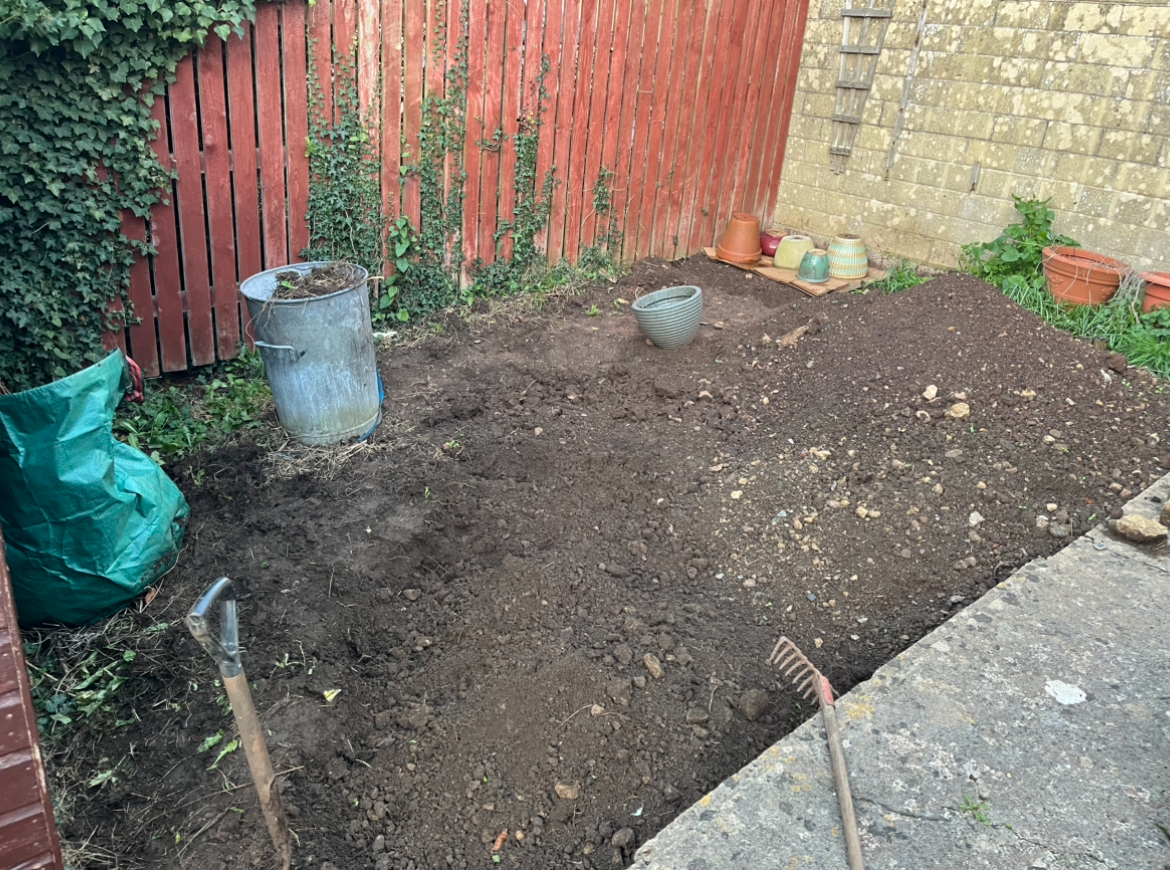
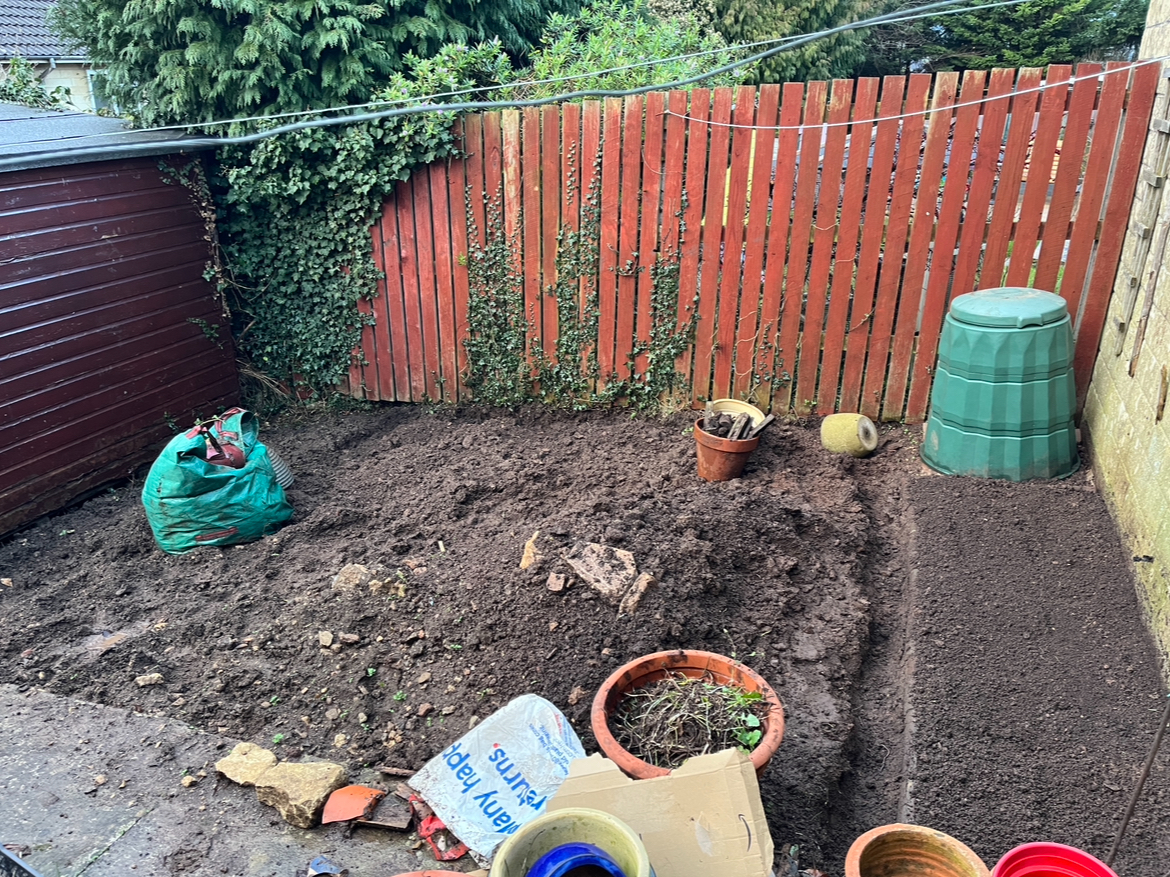
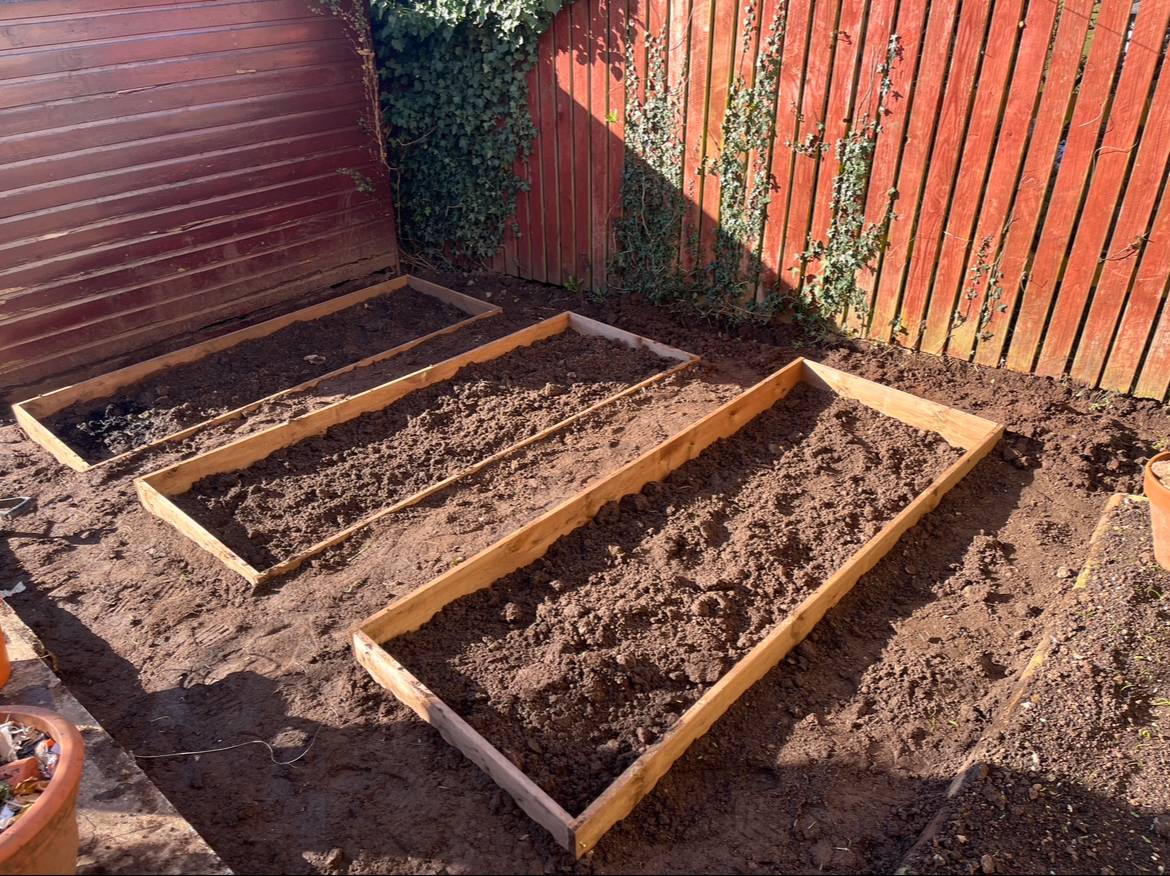
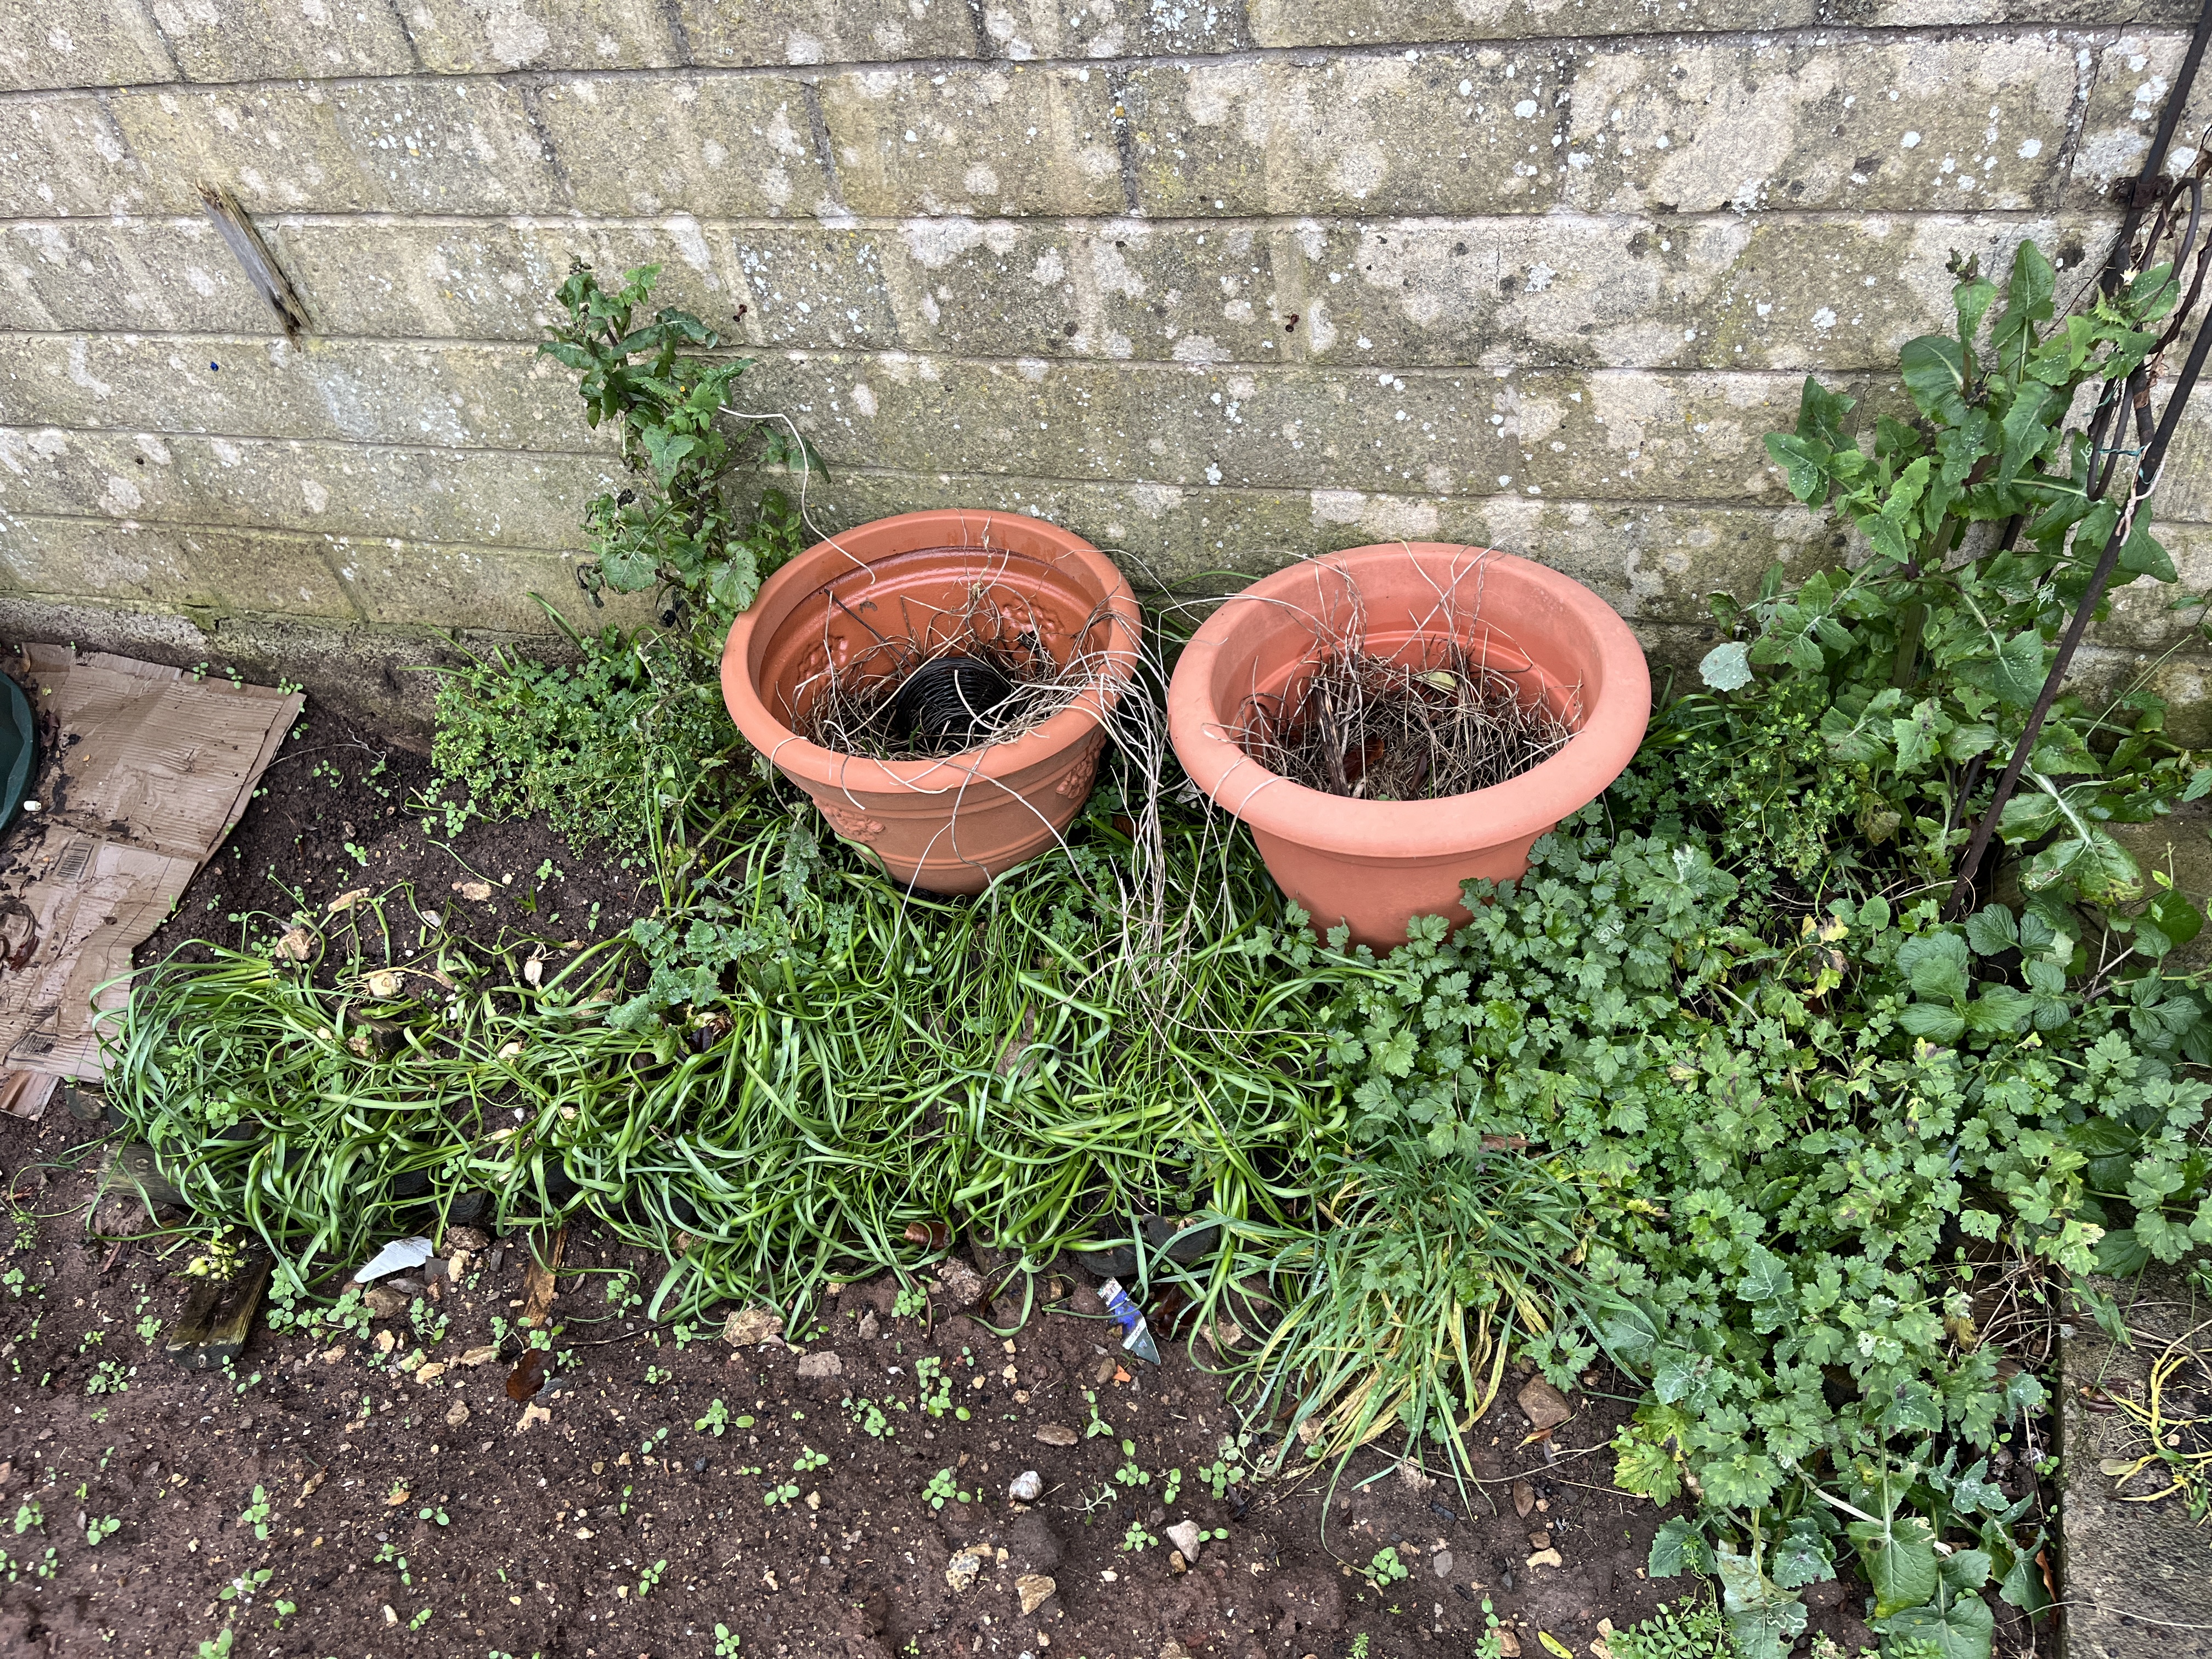
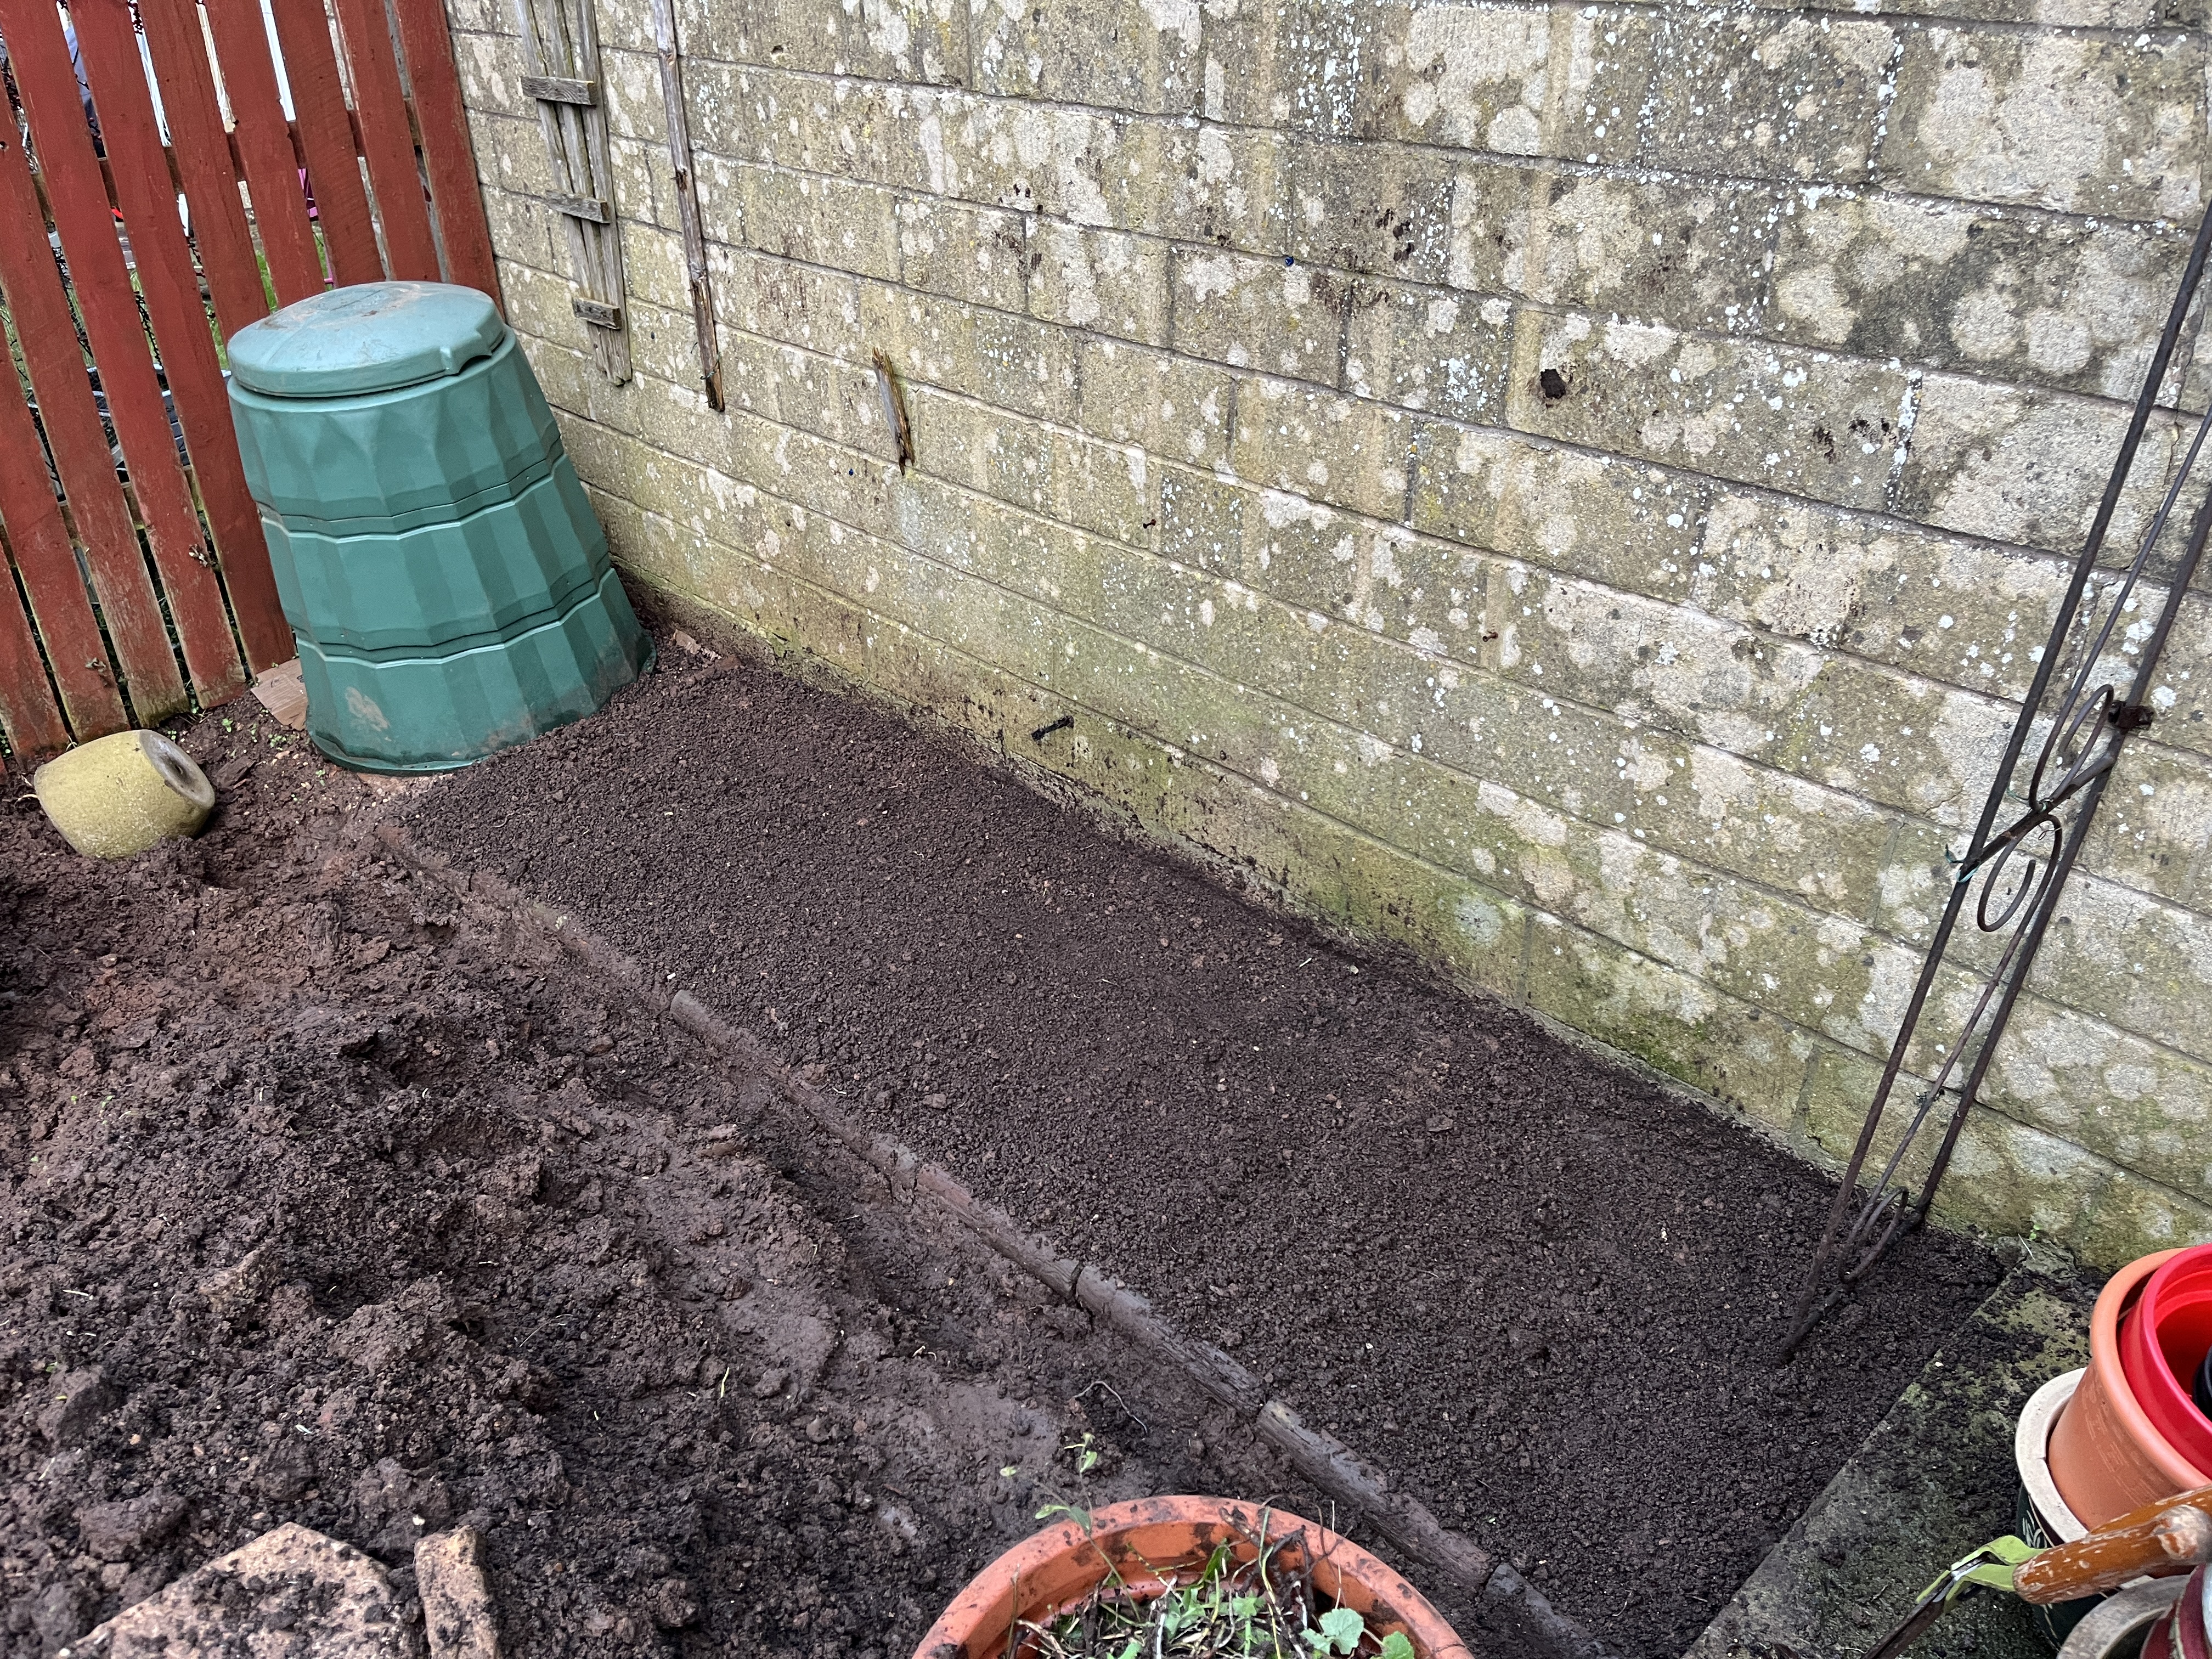
What a transformation, hey?
Follow my gardening journey…

If you’re a fellow beginner, a curious onlooker, or someone who just enjoys watching seeds (hopefully) turn into food – you can subscribe below and join me on this gardening adventure.
Diary of a Clueless Gardener: Installing Veg Boxes for the First Time


I’m so very excited to share that our veg boxes are in! 

They are yet to be filled and planted in but we’re so almost there. Very exciting indeed. We’ll have veg growing before you know it! It’s taken hard work to get to this point, and we’ve already learnt so much on the way. 

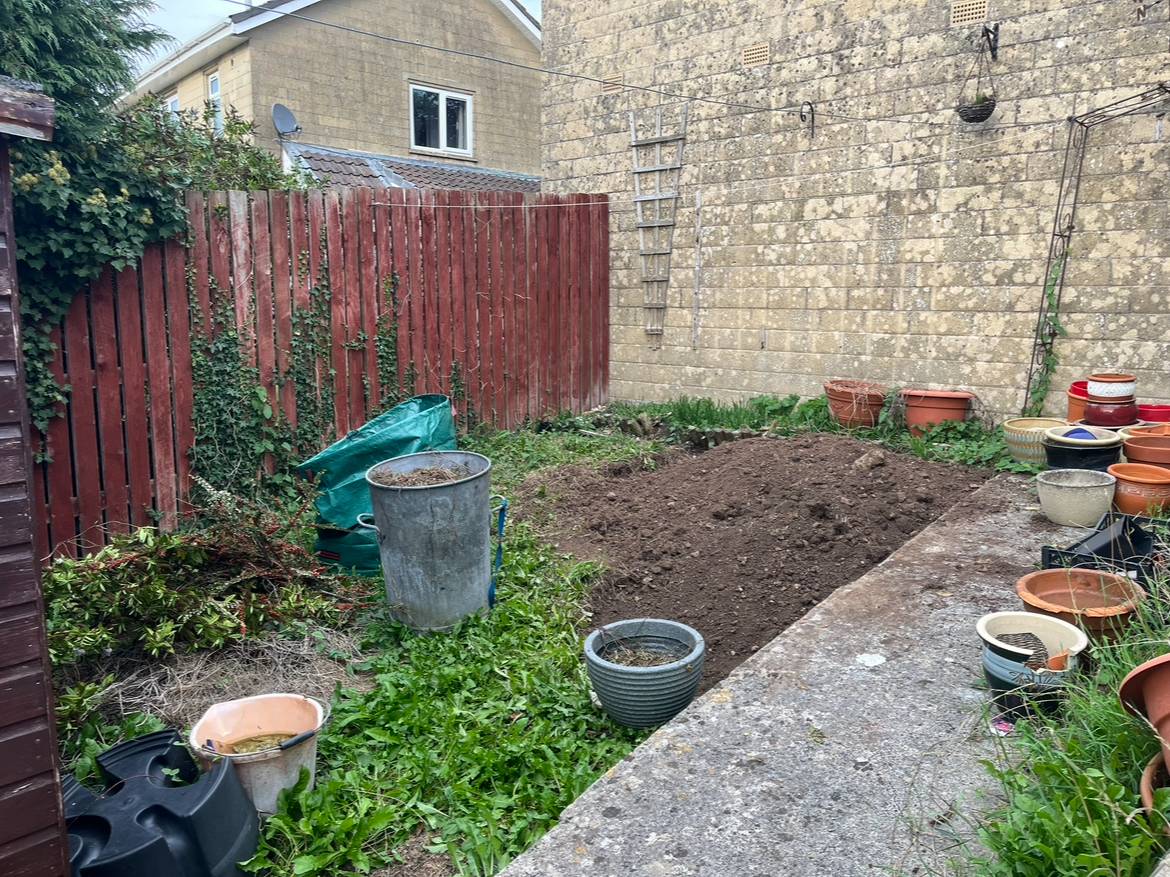
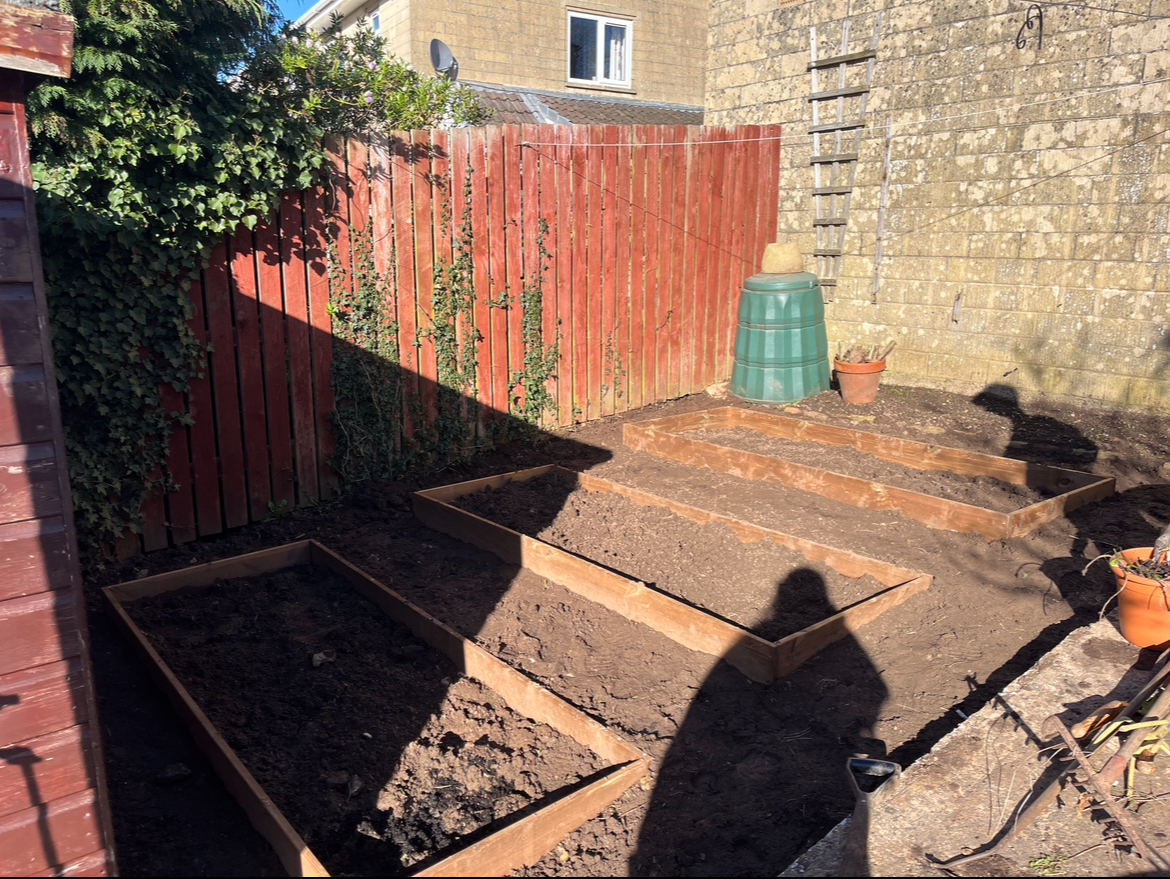
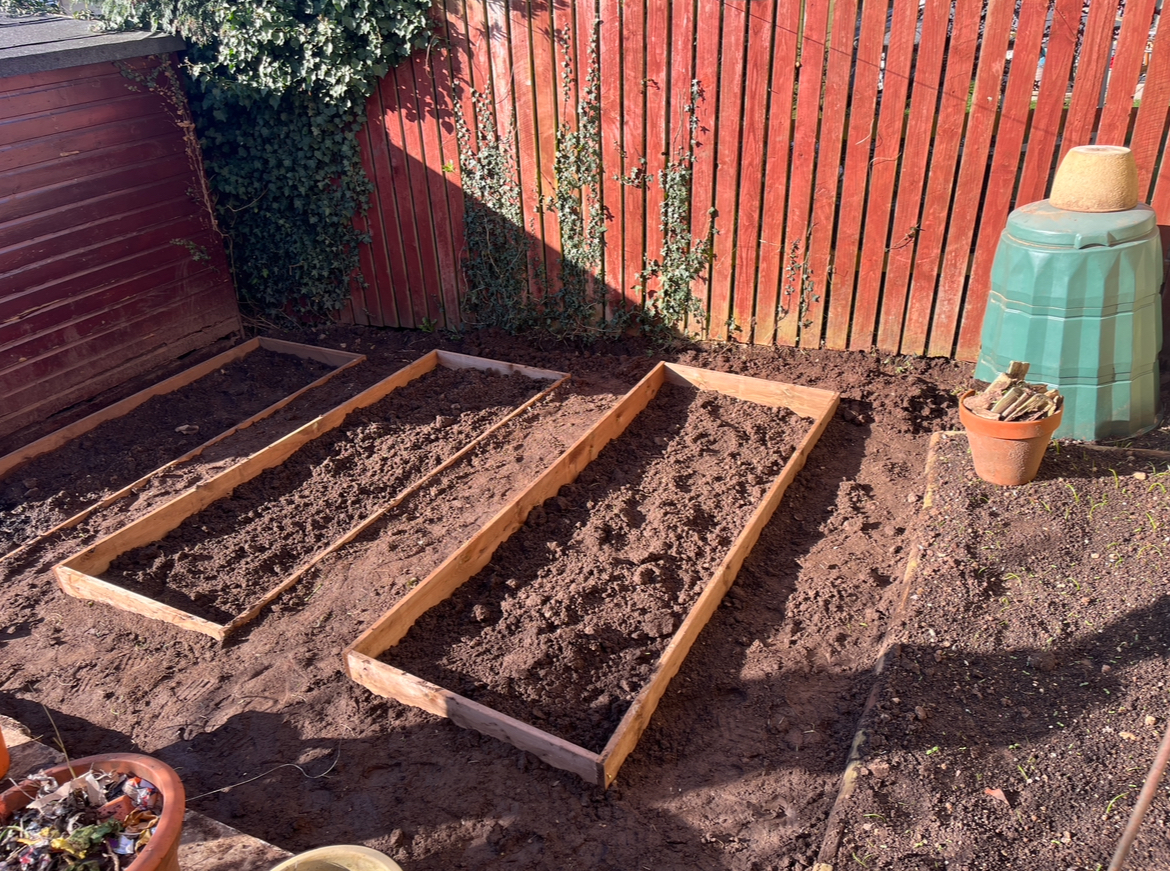
For anyone new here, let me share the journey the top corner of our garden has taken. What used to be a bindweed-ridden patch of grass slowly turned into something resembling a much muddier scene from Holes, before eventually becoming home to a compost bin, the beginnings of a flower bed, and now three wooden veg boxes. It’s been quite the transformation.

Drag to see the before and after!

Clearing the ground 

It all started in the last week of September 2025 (oh wow, how time flies!). Shem and I began our digging journey on the weed ridden area. I had considered doing the no-dig method but we wanted to be ready to grow vegetables in the coming spring 2026. From what I’ve heard, the no-dig method takes a while – especially when you’re dealing with stubborn weeds like bindweed and dandelions!

We also had no idea what we were doing, really. There were many moments when I was standing in the deep mess I had just dug, wondering if we had been rather incompetent in our approach. 

However, I’m a big believer of the best way to learn is by doing – and that often includes mistakes too. I’m sure we will look back at this first experience of gardening and laugh at ourselves though.

Anyway, after lots and lots of digging – and lots and lots of pulling of roots – we finally started to get somewhere.  

Planning our veg boxes

When building a vegetable patch, it’s important to think about space and layout. We wanted the veg boxes to be practical to work with, but also fit nicely into the corner without making the space feel cramped.

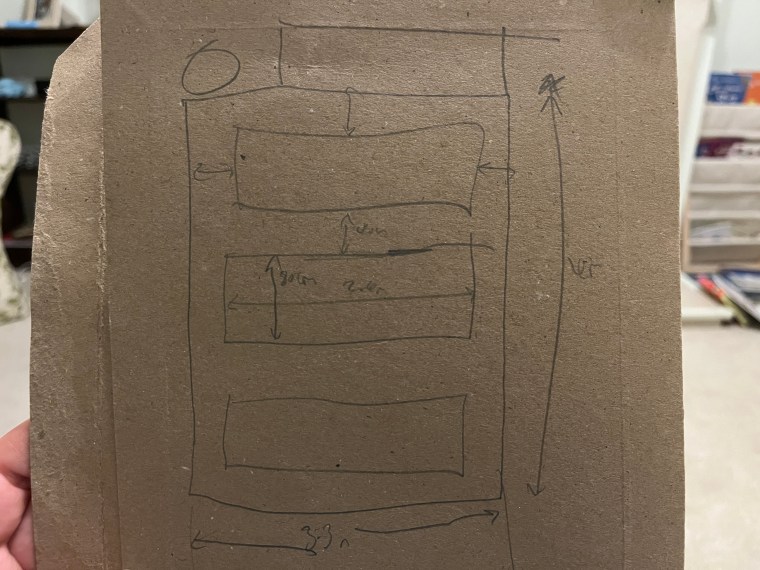
Shem has been the mastermind behind this planning really. He’s a numbers man, and has a great eye for detail. Here’s a little snap of his plan:

To translate the picture above, the plot is 4m x 3.3m. Each veg box is 2.2m x 80cm. We have also built a footpath around the veg boxes (which will be a wood chip path) of 40-50cm all the way around. Also, our garden is on a slope so each veg box is slightly platformed. 

Why we chose veg boxes

Ok, so I keep calling them veg boxes but they’re technically not. We wanted to start simple so rather than investing in raised beds or pre-made structures, we went for DIY wooden veg boxes on the ground. 

Essentially, they are planks of wood that Shem screwed together to create neat planting areas – something to contain the soil, define the space, and keep our veg organised.

There were a few reasons for this approach:

  1. Cost-effective – Using basic planks meant we could create multiple boxes without spending a fortune.
  2. Aesthetics – I quite like the look of borders around veg patches, and it makes everything feel neat and tidy.
  3. Control over soil – Even though the boxes are on the ground, they help keep the soil contained and make it easier to add compost or mulch.
  4. Beginner-friendly – As first-time gardeners, this was a manageable way to get started without feeling overwhelmed.

The idea is that the veg boxes will give a clear structure to the top corner of our garden and set us up nicely for when we start planting.

Positioning the boxes

I can’t say that I had much to do with actually getting the boxes in – that was all Shem. Thanks to such great planning beforehand, it was quite straightforward to do. 

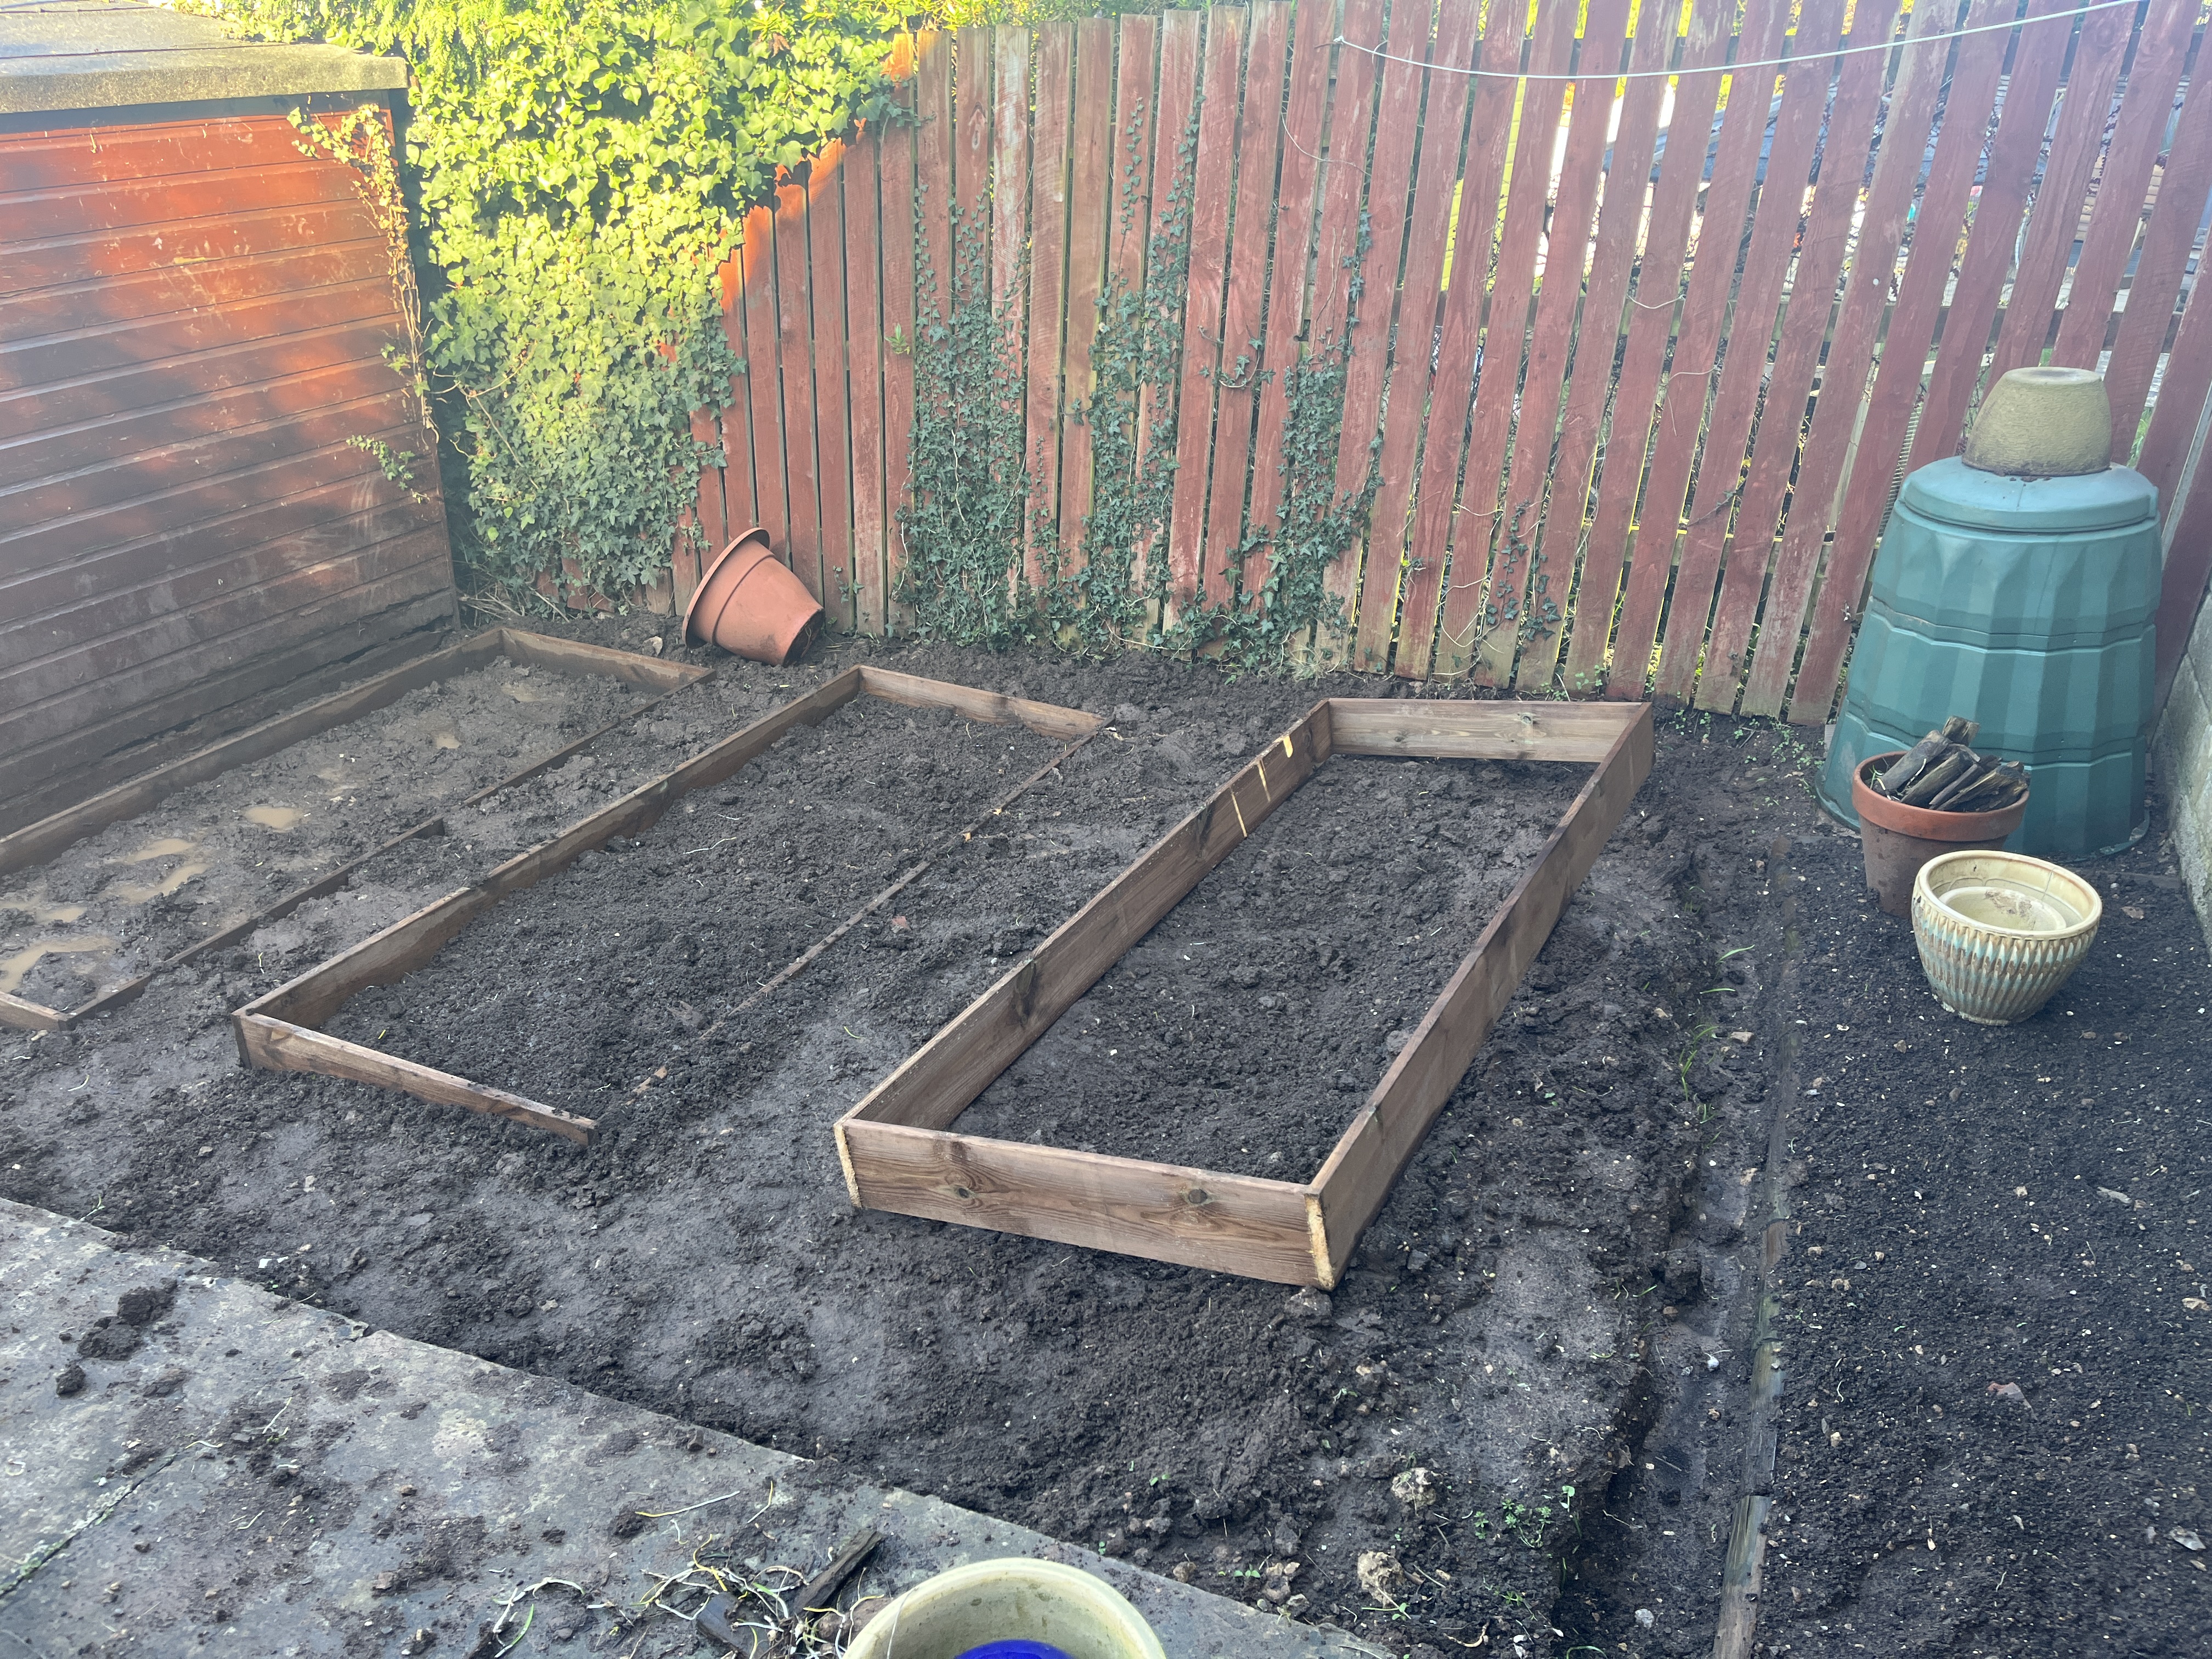
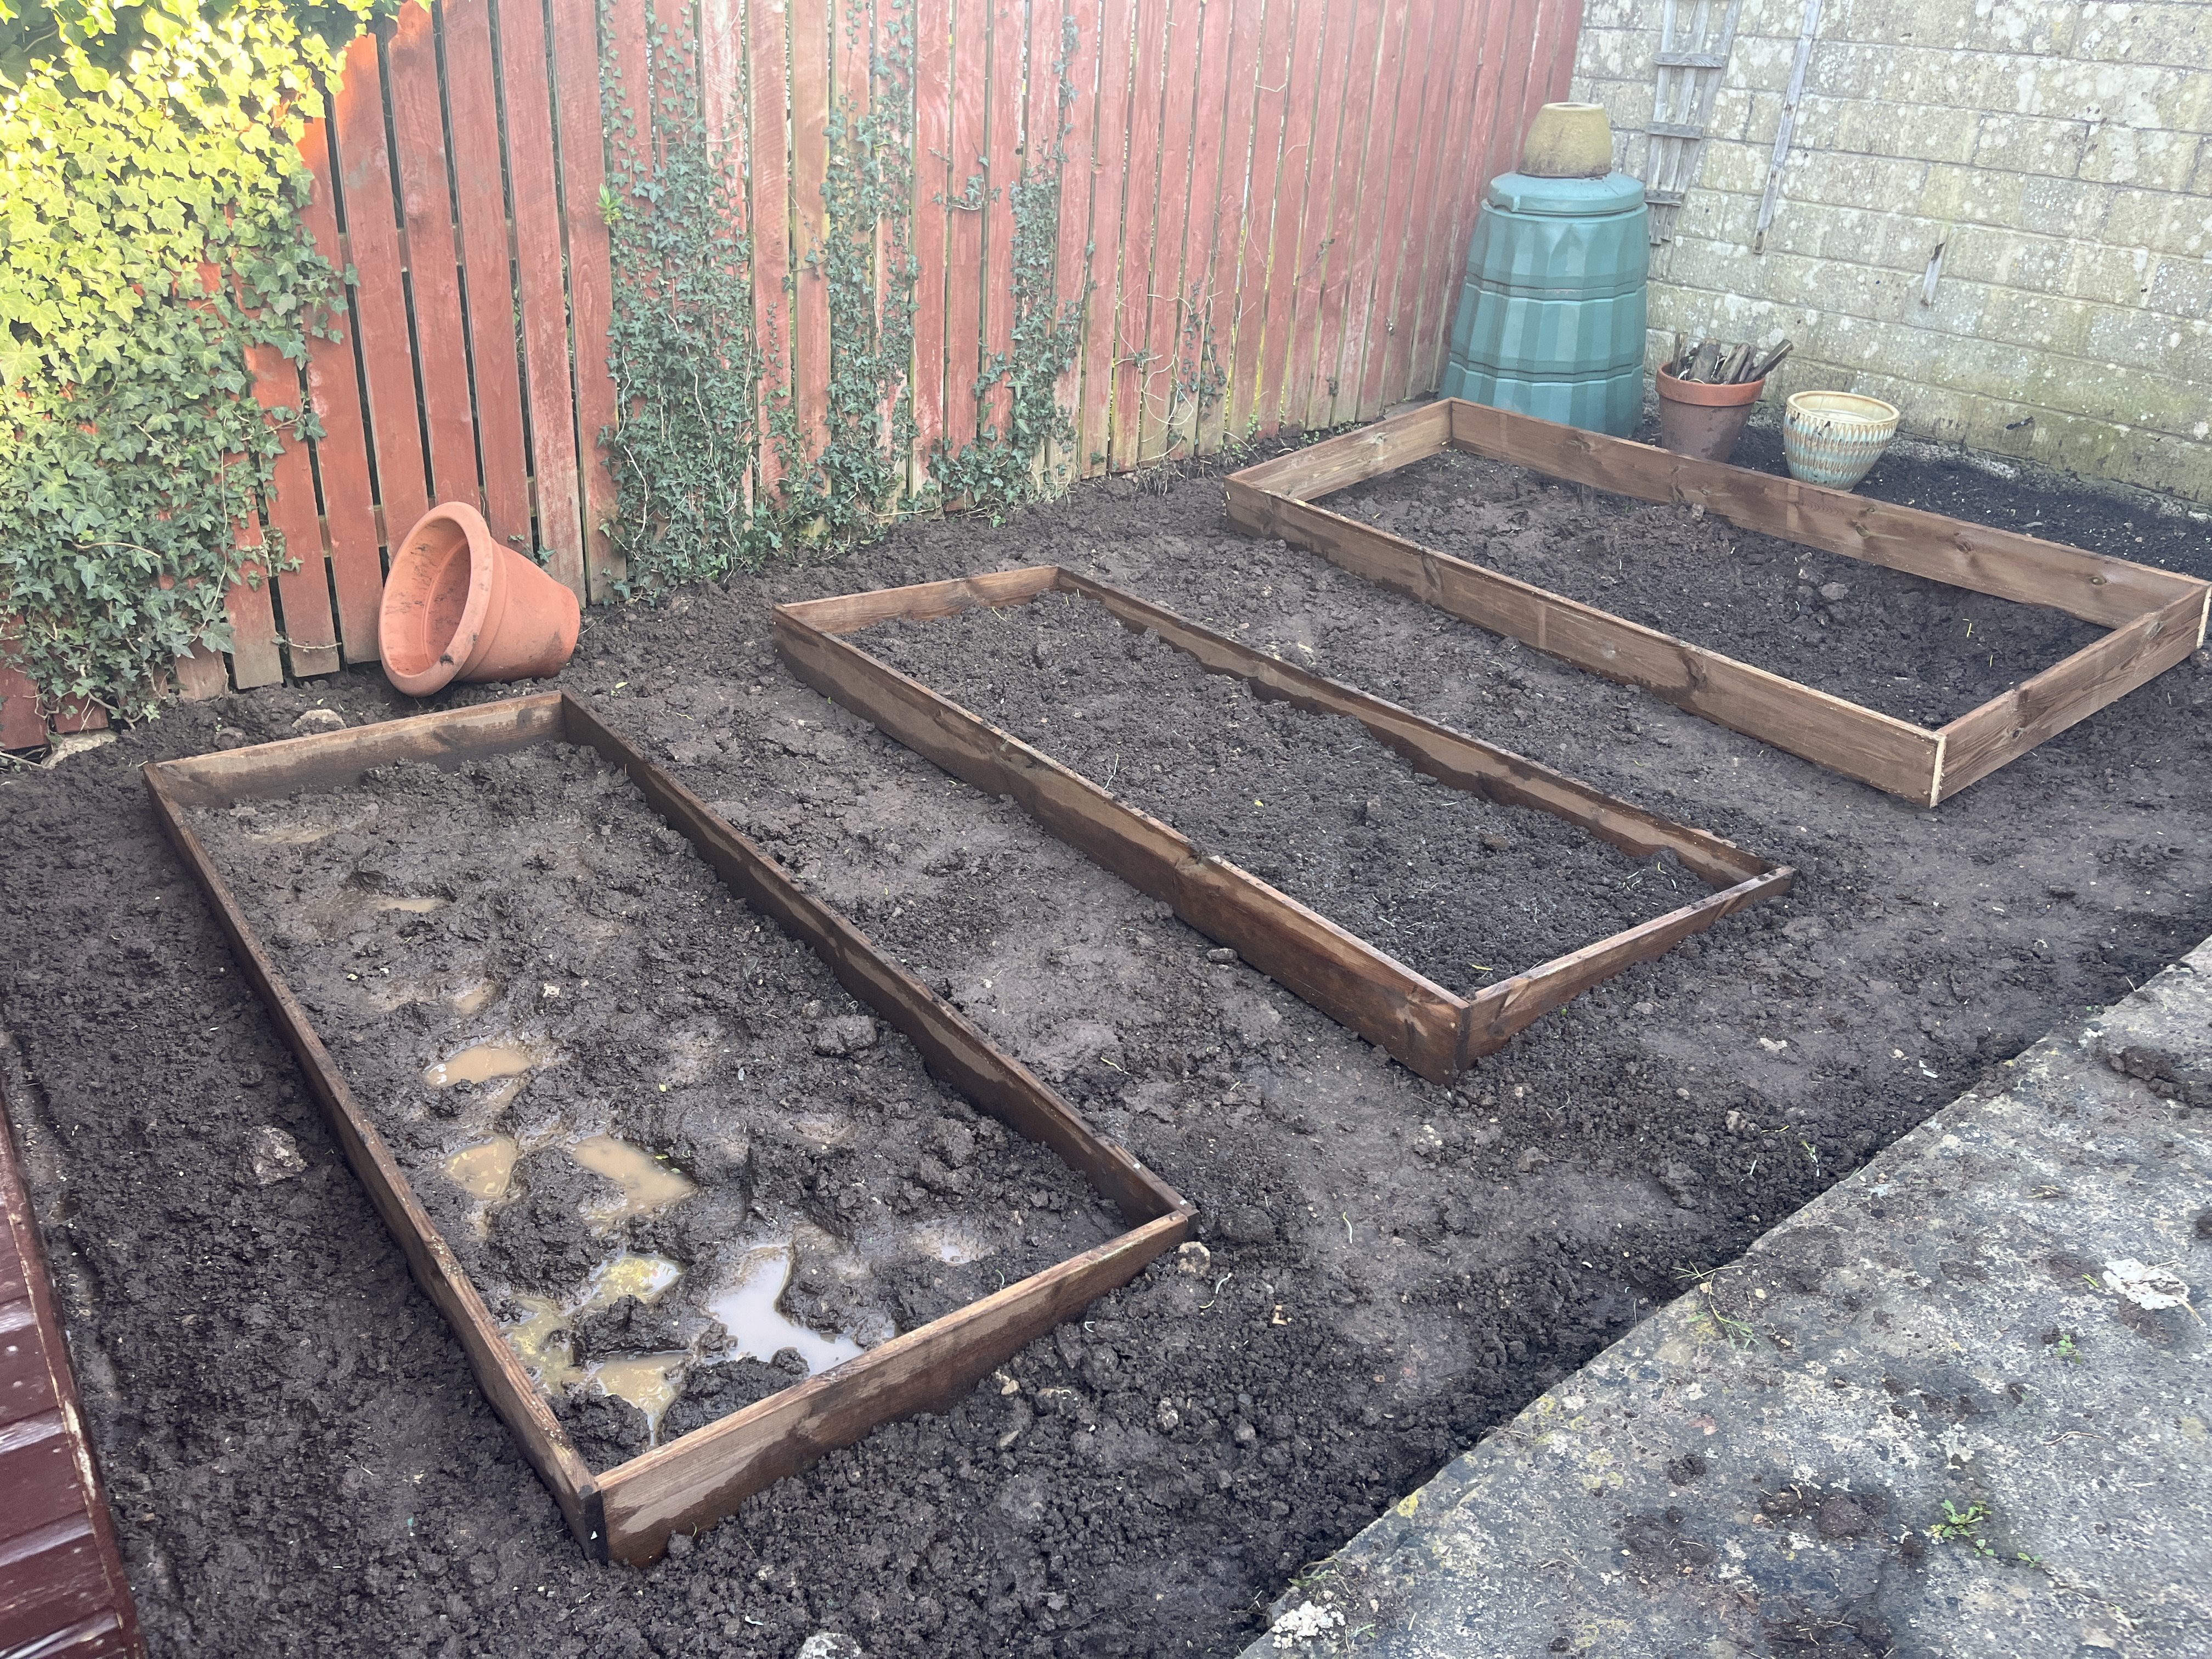
The biggest challenge, apparently, was shifting lots of soil to create the small platforms for each box. Our garden sits on a slope, so a bit of levelling was needed to make sure everything sat properly.

Once the frames were in a couple of layers of cardboard were laid down to kill off any leftover weeds and then topped with some soil. 

So… what happens next?

Although I can finally look at the top of the garden and say “wow, this is actually starting to look like a vegetable garden”, we are far from finished. 

Next up, we need to:

  • Fill the boxes with compost and prepare the soil
  • Make final decisions on what vegetables we’ll grow (I’m thinking we should start simple)
  • Plan out our veg boxes and where each vegetable should grow
  • Actually plant something – and hope it survives!

But for now, our veg boxes are just sat there empty, waiting patiently.

And Shem and I are basking in the joy of what feels like a finished job but is really just the beginning of our growing journey. 

The proof is in the pudding! (Well, veg patch)

Follow my gardening journey…

If you’re a fellow beginner, a curious onlooker, or someone who just enjoys watching seeds (hopefully) turn into food – you can subscribe below and join me on this gardening adventure.
Diary of a Clueless Gardener: An Overdue Garden Update


Okey dokey, we’re at a pretty good point! 

I’ve been rather absent from this blog recently. Life’s been busy and I figured I should spend any spare time gardening, rather than writing about gardening! 

Well, that’s just what we’ve been doing, and we’ve made some good progress. The top corner of our little garden is really getting there. We have a compost bin in the corner, a flower bed at the top, and two out of three veg boxes in place! (See pictures at the bottom of this post). 

We’re now at a stage where the space is prepped and we want to get growing… but I feel a little scared. I feel like I’m missing a stage. 

So I’m here to give a quick update on the garden and think out loud about what to tackle next. For now, I’m just focusing on the flower bed. The final veg box is coming soon, so stay tuned to hear how we approach that too.

Clearing the chaos

There was already a flower bed at the top of our garden. It was overgrown and riddled with bindweed, but there were also some lovely flowers that popped up last spring / summer time. 

However, and I’m still not sure this was the right thing to do, we purged the ground. We dug deep and removed everything to start completely afresh, then levelled the soil and built a new border using blocks from the old wooden edging. And I must say, it’s looking rather nice!

Drag to see the before and after of our flower bed!

From what I’ve researched (and the fact there was already one here before), this seems like a good location for a flower bed. It gets sun for much of the day and sits against a wall, so it’s sheltered from strong winds – hopefully preventing taller plants from toppling over.

The floral plan (in theory)

I’ve managed to collect a few different types of flower seeds. Our Gardener’s World magazines have all come with a packet, and so far, we’ve received: 

Delphiniums – some of my favourites, as they remind me of my wedding bouquet – I’m very excited about these ones! I’ve already sown these in pots in the conservatory and I’m (impatiently) waiting for them to germinate.

‘Red Midgets’ – low maintenance, self-seeding perennials, which feels perfect for a first-time grower who isn’t particularly disciplined in caring for plants yet. 

Daras – I wouldn’t call these the prettiest of flowers but the packet says they are ‘pollinator magnets’ and great for wildlife in the garden – so that’s always a win. 

I was also given sweet peas, De Caen anemone mix and Blanda anemone mix for my birthday, so plenty to experiment with! I would also really love some lavender in there too but I’m thinking of buying a part-grown pot of this to transfer in (any advice around this would be appreciated!). 

The missing piece

So we have beds prepared, and seeds ready to plant. However, in a brief conversation with someone at church, they mentioned preparing soil… which I have no clue about. 

But to prevent this post from being super long, and to give me a bit more time to do a deep dive into soil preparation, I’ll leave it here for now. Just a little update on our garden, and a sneak peek into some of the flowers we’re hoping to grow. 

There’s so much to learn on this gardening journey. Some days I feel far away from having a functioning garden, and other days it feels so tangibly close. 

I just hope that I’m implementing all that I’m learning well. It’s been 10 days since I planted the delphinium seeds, and there’s no sign of life so far – I hope they show up soon! 

See, some good progress…

Spoiler alert: I’ll post progress pictures for this little corner when all of the veg boxes are in!

Follow my gardening journey…

If you’re a fellow beginner, a curious onlooker, or someone who just enjoys watching seeds (hopefully) turn into food – you can subscribe below and join me on this gardening adventure.
Diary of a Clueless Gardener: Ready, Steady, Sow! (Starting Seeds Indoors for the First Time)


Spring is getting closer and closer and, although our veg patches aren’t quite ready yet, it’s about time we started thinking seriously about growing our own vegetables. Thankfully, even though the weather has been particularly ghastly recently, this is a step that can be started indoors.

It’s time to start sowing some seeds!

But I’m coming at this with completely fresh eyes – I’m a real blank canvas when it comes to knowing how to go about it. The only vegetable seeds I’ve ever sown from seed were cress in Year 5 at primary school.

I had briefly considered buying already-grown vegetable plants and simply planting them out when the time was right. However, after reading this month’s edition of Gardeners’ World, and seeing Monty Don speak rather excitedly about growing veg from the very beginning and watching a seedling emerge, I was convinced to give it a go.

I’ve been doing lots of reading and research around sowing seeds, and there’s a lot of information out there. Even after getting to grips with the basics, I still found myself with plenty of questions. So I thought the best way to process it all was to write about it – and hopefully, if anyone else is asking similar things, there might be some helpful answers here too.

I’ll be sharing updates as I go, documenting what works, what doesn’t, and everything I learn along the way – so if you’re interested in sowing seeds for the first time too, you’re very welcome to follow along.

Seed sowing basics (as I understand them, anyway)

  1. Decide on your plants and buy the seeds. 
  2. Sow all tender plants indoors, while more robust ones can be sown directly into the ground outside.
  3. For indoor sowing, find a warm and sunny space to grow your seedlings.
  4. Fill a seed tray or pot with peat-free compost and thinly sow seeds on the surface.
  5. Gently soak the compost with water, being careful not to dislodge the seeds. 
  6. Cover with a clear plastic bag or lid
  7. Label pots with the plant name and date
  8. Leave to germinate

What sowing seeds looks like for my garden

As it’s our first time, I want to start with some simple-to-grow vegetables, while also choosing ones we eat regularly. We’re going to attempt to grow: carrots, beetroot, spring onions, spinach, lettuce, courgettes, broad beans and potatoes (and perhaps some herbs and strawberries).

Most of these are best sown into the ground outside. However, I would quite like to properly learn the process of growing from seed so I’m going to get a head start on some lettuce and spinach and begin sowing them indoors. Learning to sow indoors will hopefully be a useful skill to adopt so I’m just going to see this as good practice. 

Courgettes are best started indoors as they are more delicate and therefore sensitive to the cold. I think I’ll still try to sow these from seed and can always buy an already sown plant ready to put in the ground once the weather is a little warmer.

So that I don’t complicate this post, or make it too long, I’ll just focus on indoor sowing for now and can think about the outdoor sowing further down the line – once the weather is right, and when our veg patches are ready! 

My shopping list for indoor sowing

  • Seeds
  • Peat-free compost
  • Seed sowing pots / trays (I’m going to try using toilet roll holders too, because apparently that works!)
  • Plant labels 
  • Dibber 

Beginner questions about sowing seeds

Even after all this reading, I still had a few unanswered questions: 

  • How often should you water newly sown seeds?
  • Where’s the best place to keep seed trays before and after germination?
  • How long does germination usually take? 
  • When is a seedling ready to be planted out?

So I did some further, more specific reading around these!

How often should you water newly sown seeds?

Surprisingly, it took a while to find a straightforward answer to this. In short, the pots should be checked daily and gently watered (perhaps with a spray bottle) as needed. The general advice is to keep the soil damp – moist, but not soggy. Putting a clear plastic cover over the pot should help retain moisture. 

Where’s the best place to keep seed trays before and after germination?

The obvious answer to this is somewhere with sunlight, which would be our conservatory. However, when it’s almost February and we have rather cold weather, this would not be suitable because the germination period needs heat. One option is to use a propagator or heated mat but I would like to keep things simple for now. 

An article titled The Beginner’s No-Fail Guide to Starting Seeds Indoors offered a helpful insight into this. It points out that sunlight isn’t essential at the very beginning of the germinating process so suggested putting seed trays in a warm room for the beginning part. As soon as there’s any sign of germination, they must be moved to sunlight to prevent leggy, weak growth. 

How long does seed germination take?

This question actually only dawned on me as I was writing this post. I think because I mentioned “germination” so often, I realised I wasn’t actually sure where it began and ended!

Of course, it’s not a one size fits all situation, germination time varies depending on the plant. For most vegetables it can take anywhere from a few days to a couple of weeks. Salad leaves like lettuce and spinach are fairly speedy and can show signs of life in around 7–14 days, while others are happy to keep you waiting a little longer. 

Apparently, you’ll know a seed has germinated when you see the very first green shoot pushing its way up through the compost. These first leaves aren’t the “real” leaves of the plant yet – they’re called seed leaves – but they’re a very reassuring sign that something is happening below the surface. Until that point, it’s mostly a waiting game (and an exercise in patience).

When is a seedling ready to be planted out?

I’d assumed that once a seed had germinated and grown a bit, it could pretty much go straight from the seed tray into the veg patch. It turns out there’s a small (but important) middle step. 

After germination, seedlings need time indoors to grow stronger. I’ll need to look out for their ‘true leaves’ – these appear after the initial seed leaves and look more like the actual plant. 

But even then, most seedlings aren’t quite ready for the garden yet. Before planting them into the veg patch, they need to be hardened off. This means gradually introducing them to outdoor conditions by putting them outside for short periods each day and slowly increasing the time over about a week. 

Once seedlings have several true leaves, have been hardened off, and there’s no risk of frost, they’re ready to be planted in the ground. 

So it’s not quite from seed tray to soil straight away, there’s more of a gentle transition that helps the plants survive (and hopefully thrive).


Okey doke, there we have it – I’m ready to buy my shopping list and have a slightly better understanding of what I’m actually doing. Next up is putting all this reading into practice and seeing whether anything green decides to show up. 

I’m fully expecting a bit of trial and error along the way, but that’s part of the fun (I hope). If you’re also new to sowing, or if you’re a seasoned grower with wisdom to share, I’d love to hear from you. I’ll keep sharing updates as we go – how exciting! 

Photo by Markus Spiske on Unsplash

Follow my gardening journey…

If you’re a fellow beginner, a curious onlooker, or someone who just enjoys watching seeds (hopefully) turn into food – you can subscribe below and join me on this gardening adventure.